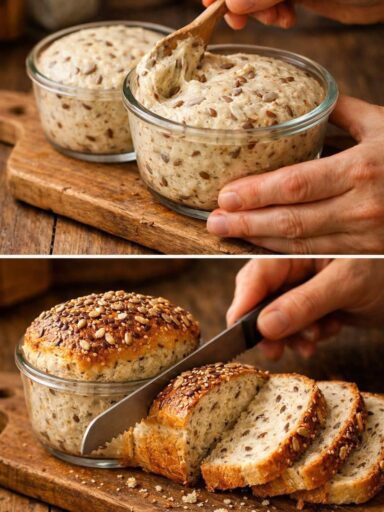
admin1
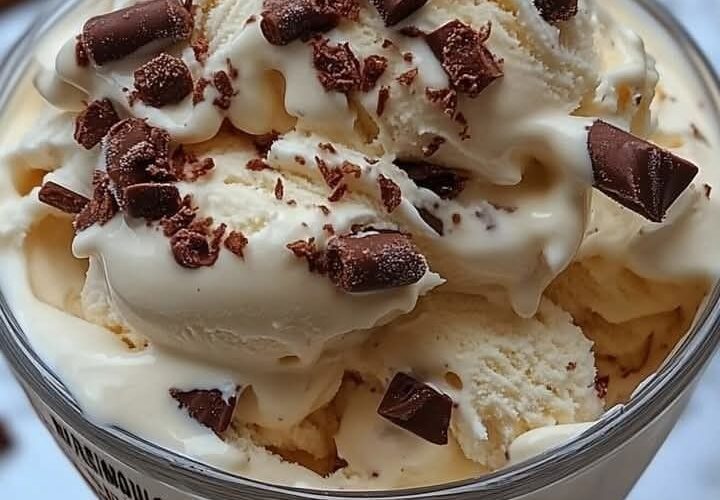
Creamy, rich, and packed with real vanilla flavor, homemade vanilla ice cream is a timeless dessert that never goes out of style. Whether served in a cone, alongside warm brownies, or topped with fresh fruit, this classic frozen treat is surprisingly easy to make at home. The beauty of homemade ice cream is the freshness and flavor you simply can’t get from store-bought versions. With a few basic ingredients and a little patience, you can create smooth and velvety vanilla ice cream that tastes absolutely incredible.
This recipe uses a traditional custard base made with cream, milk, egg yolks, sugar, and vanilla. The custard method creates an ultra-creamy texture and luxurious taste. If you own an ice cream maker, the process becomes even easier, but you can also freeze it manually with a few extra steps.
Why You’ll Love This Vanilla Ice Cream
- Rich and creamy texture
- Made with simple ingredients
- Perfect balance of sweetness and vanilla flavor
- Great base for mix-ins and toppings
- Better than store-bought ice cream
Preparation Time
- Prep Time: 20 minutes
- Chilling Time: 4 hours
- Churning Time: 20–25 minutes
- Freezing Time: 4 hours
- Total Time: About 8 hours
Servings
Makes about 1 quart (6–8 servings)
Ingredients
- 2 cups heavy cream
- 1 cup whole milk
- ¾ cup granulated sugar
- 1 tablespoon pure vanilla extract
- 1 vanilla bean (optional but recommended)
- 5 large egg yolks
- Pinch of salt
Equipment Needed
- Medium saucepan
- Mixing bowls
- Whisk
- Fine mesh strainer
- Ice cream maker
- Airtight freezer-safe container
Step-by-Step Instructions
Step 1: Heat the Milk and Cream
In a medium saucepan, combine the heavy cream, whole milk, half of the sugar, and a pinch of salt.
If using a vanilla bean, split it lengthwise with a knife and scrape out the seeds. Add both the seeds and pod to the saucepan for extra flavor.
Place the saucepan over medium heat and warm the mixture gently. Stir occasionally until the sugar dissolves completely and the mixture becomes hot but not boiling.
Once steam begins to rise from the surface, remove the pan from heat.
Step 2: Whisk the Egg Yolks
In a separate mixing bowl, whisk together the egg yolks and the remaining sugar until the mixture becomes pale yellow and slightly thick.
This step helps create a smooth custard and ensures the sugar begins dissolving into the yolks.
Step 3: Temper the Eggs
Tempering prevents the eggs from scrambling when added to the hot cream mixture.
Slowly pour about ½ cup of the warm cream mixture into the egg yolks while whisking constantly. Continue adding another cup gradually, whisking the entire time.
Once warmed, pour the egg mixture back into the saucepan with the remaining cream mixture.
Step 4: Cook the Custard
Return the saucepan to low heat. Stir continuously using a wooden spoon or spatula.
Cook gently until the custard thickens slightly and coats the back of the spoon. This usually takes about 5–7 minutes.
Do not let the mixture boil, as high heat can curdle the eggs.
To check if it’s ready, run your finger across the back of the spoon. If the line stays clear, the custard is done.
Step 5: Strain and Add Vanilla
Remove the custard from heat. Strain it through a fine mesh sieve into a clean bowl to remove any cooked egg bits and the vanilla bean pod.
Stir in the vanilla extract.
For best flavor, use high-quality pure vanilla extract instead of imitation vanilla.
Step 6: Chill the Mixture
Cover the bowl with plastic wrap, pressing it directly onto the surface of the custard to prevent a skin from forming.
Refrigerate for at least 4 hours or overnight until completely cold.
A well-chilled base creates smoother ice cream and churns faster.
Step 7: Churn the Ice Cream
Pour the chilled custard into your ice cream maker and churn according to the manufacturer’s instructions.
Most machines take about 20–25 minutes to produce soft-serve consistency ice cream.
At this stage, you can add optional mix-ins such as:
- Chocolate chips
- Crushed cookies
- Caramel swirls
- Fresh berries
- Chopped nuts
Step 8: Freeze Until Firm
Transfer the churned ice cream to an airtight container.
Smooth the top with a spatula and cover tightly.
Freeze for at least 4 hours for a firmer, scoopable texture.
Tips for Perfect Vanilla Ice Cream
Use Full-Fat Dairy
Heavy cream and whole milk provide the creamy texture homemade ice cream is known for. Lower-fat substitutes can make the ice cream icy.
Chill Everything Thoroughly
Cold custard churns better and freezes faster, producing smaller ice crystals and smoother texture.
Don’t Skip the Salt
A tiny pinch of salt enhances the sweetness and deepens the vanilla flavor.
Use Real Vanilla
Vanilla beans and pure vanilla extract provide the richest flavor. Artificial vanilla won’t taste nearly as smooth or aromatic.
No Ice Cream Maker Method
If you don’t own an ice cream maker, you can still make delicious vanilla ice cream.
After chilling the custard:
- Pour it into a freezer-safe dish.
- Freeze for 45 minutes.
- Remove and stir vigorously with a fork or whisk.
- Repeat every 30–45 minutes for about 3–4 hours until creamy and frozen.
This method helps break up ice crystals for smoother texture.
Serving Suggestions
Homemade vanilla ice cream pairs beautifully with many desserts and toppings.
Serve it with:
- Warm chocolate cake
- Apple pie
- Brownies
- Fresh strawberries
- Hot fudge sauce
- Caramel drizzle
- Crushed cookies
- Waffle cones
You can also turn it into milkshakes, ice cream sandwiches, or sundaes.
Storage Instructions
Store homemade vanilla ice cream in an airtight container in the freezer for up to 2 weeks.
To keep it extra creamy, place a sheet of parchment paper or plastic wrap directly on the surface before sealing.
Allow the ice cream to sit at room temperature for 5 minutes before scooping if it becomes too firm.