admin1
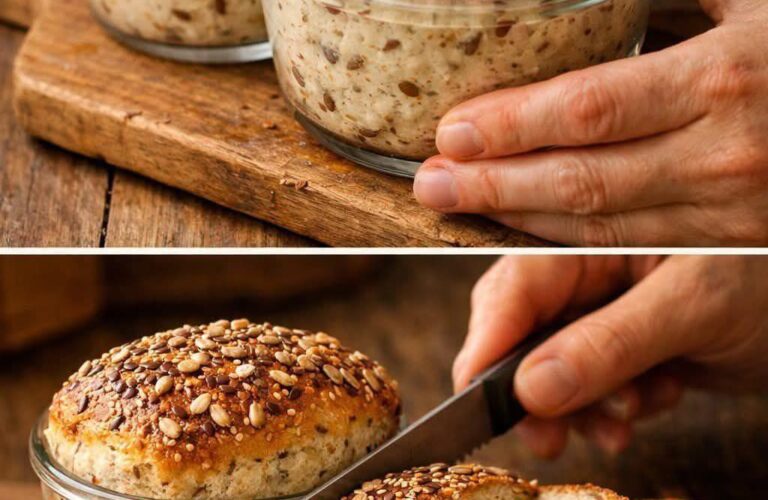
Seeded No-Knead Jar Bread is a rustic, hearty homemade bread packed with wholesome seeds and baked with minimal effort. This recipe is perfect for beginner bakers because it requires no kneading, no complicated techniques, and only simple pantry ingredients. The dough slowly ferments to create a flavorful loaf with a crisp crust, soft interior, and delicious nutty texture from mixed seeds.
The “jar bread” method refers to mixing and proofing the dough in a large jar or bowl, making cleanup easier while allowing the dough to rise beautifully. This bread is excellent for sandwiches, toast, soups, or simply enjoying warm with butter.
The blend of seeds adds crunch, nutrition, and earthy flavor while making the loaf look bakery-quality. Whether you are new to bread baking or already love homemade bread, this easy seeded loaf is a satisfying recipe that fills your kitchen with the comforting aroma of fresh bread.
Ingredients
Dry Ingredients
- 3 cups all-purpose flour or bread flour
- 1 teaspoon salt
- 1 teaspoon sugar or honey
- ½ teaspoon instant yeast
Seeds
- 2 tablespoons sunflower seeds
- 2 tablespoons pumpkin seeds
- 1 tablespoon sesame seeds
- 1 tablespoon flaxseeds
- 1 tablespoon chia seeds
Wet Ingredients
- 1 ½ cups warm water
- 1 tablespoon olive oil
Optional Topping
- Extra mixed seeds for topping
- Oats for garnish
Instructions
Step 1: Mix the Dough
In a large mixing jar or bowl, combine:
- Flour
- Salt
- Sugar
- Instant yeast
Stir the dry ingredients together until evenly mixed.
Add:
- Sunflower seeds
- Pumpkin seeds
- Sesame seeds
- Flaxseeds
- Chia seeds
Mix again so the seeds are evenly distributed throughout the flour.
Pour in the warm water and olive oil.
Use a wooden spoon or spatula to stir until a shaggy sticky dough forms.
The dough will look rough and slightly wet, which is completely normal for no-knead bread.
Step 2: First Rise
Cover the jar or bowl tightly with plastic wrap, a lid, or a clean kitchen towel.
Let the dough rise at room temperature for 12–18 hours.
During this slow fermentation process, the dough develops flavor and texture naturally without kneading.
By morning or after the resting period, the dough should be bubbly, soft, and doubled in size.
Step 3: Shape the Dough
Lightly flour a clean work surface.
Gently scrape the dough out onto the floured surface.
Using floured hands, fold the dough over itself a few times to shape it into a rough round loaf.
Do not knead aggressively because the goal is to keep the air bubbles inside the dough.
Place the shaped dough onto parchment paper.
Sprinkle extra seeds and oats over the top if desired.
Cover loosely with a towel and let it rest for 30–45 minutes.
Step 4: Preheat the Oven
Place a Dutch oven or heavy oven-safe pot with lid into the oven.
Preheat the oven to 450°F (230°C) for at least 30 minutes.
Heating the pot helps create steam, which produces a crisp bakery-style crust.
Step 5: Bake the Bread
Carefully remove the hot Dutch oven from the oven.
Using the parchment paper, gently lower the dough into the hot pot.
Cover with the lid and bake for 30 minutes.
After 30 minutes, remove the lid and bake for another 10–15 minutes until the crust becomes deep golden brown.
The bread should sound hollow when tapped on the bottom.
Step 6: Cool Before Slicing
Transfer the bread to a wire rack and allow it to cool for at least 1 hour before slicing.
Cooling helps the interior finish setting properly.
Slicing too early may make the bread gummy inside.
Tips for Perfect No-Knead Bread
1. Use Warm Water
Warm water helps activate the yeast properly, but it should not be too hot.
2. Don’t Rush the Rise
The long fermentation time creates the best flavor and texture.
3. Keep the Dough Sticky
A wetter dough creates the soft airy texture no-knead bread is known for.
4. Preheat the Pot
A hot Dutch oven creates steam that gives the loaf a crispy crust.
5. Flour Your Hands
Sticky dough can be difficult to handle, so lightly flour your hands during shaping.
Best Seeds for Bread
This recipe works beautifully with many seeds. You can customize based on your preference.
Popular Choices
- Sunflower seeds
- Pumpkin seeds
- Sesame seeds
- Flaxseeds
- Chia seeds
- Poppy seeds
Seeds add texture, flavor, fiber, and nutrition to homemade bread.
Flavor Variations
Herb Seed Bread
Add dried rosemary, thyme, or oregano for extra flavor.
Cheese Seed Bread
Mix shredded cheddar or parmesan into the dough.
Whole Wheat Version
Replace 1 cup of white flour with whole wheat flour for a heartier loaf.
Honey Oat Bread
Add extra honey and rolled oats for a slightly sweeter flavor.
Serving Suggestions
Seeded No-Knead Jar Bread tastes wonderful with:
- Butter and jam
- Soups and stews
- Avocado toast
- Sandwiches
- Cheese boards
- Eggs and breakfast dishes
The crunchy crust and soft seeded interior make it versatile for both sweet and savory meals.
Storage Instructions
Room Temperature
Store the bread in a bread bag or wrapped in a clean towel for up to 3 days.
Freezer
Slice and freeze the bread in airtight freezer bags for up to 2 months.
Toast slices directly from frozen when ready to eat.
Why You’ll Love This Recipe
- No kneading required
- Crispy bakery-style crust
- Soft flavorful interior
- Packed with healthy seeds
- Beginner-friendly recipe
- Minimal ingredients and effort
This bread delivers artisan-style results with very little hands-on work.
Common Mistakes to Avoid
Using Too Much Flour
Adding too much flour can make the bread dense and dry.
Skipping the Long Rise
The long fermentation creates the airy texture and flavor.
Cutting Too Soon
Allowing the bread to cool completely improves texture.
Overhandling the Dough
Gentle shaping preserves air pockets inside the loaf.