 admin1
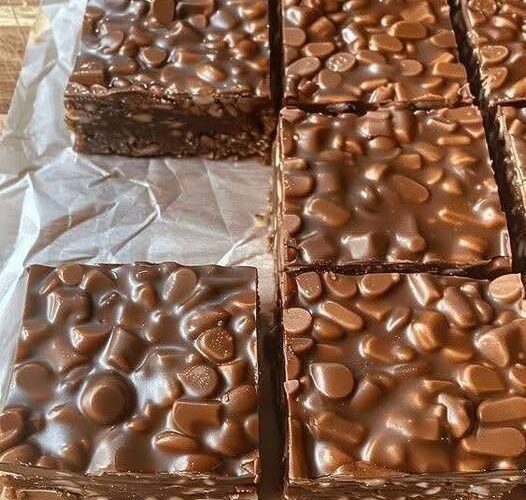
Healthy No-Bake Peanut Butter Recipe: Creamy, Nutritious, and Easy to Make
Introduction
Healthy no-bake peanut butter treats are an excellent choice when you want something sweet, satisfying, and easy to prepare without turning on the oven. Made with natural peanut butter, rolled oats, a little honey or maple syrup, and a few simple ingredients, these delicious bites offer a wonderful combination of creamy texture, nutty flavor, and natural sweetness.
This recipe is perfect for busy mornings, afternoon snacks, lunchboxes, and homemade desserts. It is especially convenient when you want to prepare something ahead of time and keep it ready in the refrigerator for whenever you need a quick snack.
Unlike traditional peanut butter desserts that often contain large amounts of butter, refined sugar, and other rich ingredients, this version focuses on simple pantry staples. Natural peanut butter provides healthy unsaturated fats and some protein, while rolled oats contribute fiber and a hearty texture. A small amount of honey or maple syrup adds sweetness without requiring a large quantity of refined sugar.
The best part is that this recipe is incredibly versatile. You can make soft peanut butter energy balls, chewy oat bites, small peanut butter bars, or chocolate-topped squares using the same basic mixture. You can also customize the flavor with cinnamon, vanilla extract, dark chocolate chips, shredded coconut, or ground flaxseed.
No baking, complicated equipment, or advanced cooking skills are required. All you need is a mixing bowl, a spoon, your ingredients, and a little time for the mixture to chill.
Recipe Overview
Preparation time: 15 minutes
Chilling time: 30–60 minutes
Total time: Approximately 45–75 minutes
Servings: 16 small energy bites or 8 larger bars
Difficulty level: Easy
Cooking method: No-bake refrigeration
Dietary style: Vegetarian, with dairy-free and vegan options
Texture: Soft, chewy, creamy, and slightly nutty
Flavor: Rich peanut butter with gentle natural sweetness
Ingredients
Main Ingredients
1 cup natural peanut butter
Choose smooth or crunchy natural peanut butter made primarily from peanuts, with little or no added sugar. Stir the jar thoroughly before measuring so that the oil is evenly distributed. Natural peanut butter creates the creamy base of the recipe and provides its characteristic roasted peanut flavor.
1½ cups rolled oats
Old-fashioned rolled oats are ideal because they provide structure while maintaining a pleasant chewy texture. Quick oats can also be used, although the finished bites may be softer. If you prefer a smoother texture, pulse the oats briefly in a food processor before adding them.
¼ cup honey or pure maple syrup
This ingredient adds sweetness and helps hold the mixture together. Honey creates a slightly floral sweetness, while maple syrup offers a gentle caramel-like flavor. Use maple syrup if you want a vegan version.
1 teaspoon pure vanilla extract
Vanilla enhances the natural flavor of peanut butter and gives the finished treats a dessert-like aroma. Although optional, it is highly recommended.
¼ teaspoon ground cinnamon
Cinnamon adds warmth and makes the peanut butter mixture taste especially comforting. You can omit it if you prefer a straightforward peanut butter flavor.
2 tablespoons ground flaxseed
Ground flaxseed adds fiber and contributes a slightly nutty flavor. It also helps absorb moisture, making the mixture easier to shape.
2–4 tablespoons unsweetened almond milk or regular milk
Add the milk gradually if the mixture seems too dry. You may not need all of it. The exact amount depends on the thickness of your peanut butter and the type of oats used.
A small pinch of salt
Salt balances the sweetness and enhances the roasted peanut flavor. If your peanut butter is already salted, use less or leave it out.
Optional Ingredients
You can personalize your healthy no-bake peanut butter treats with one or two of the following additions.
2 tablespoons dark chocolate chips: Add a little chocolate flavor and extra texture.
2 tablespoons unsweetened shredded coconut: Provides a mild coconut flavor and a pleasant chew.
1 tablespoon chia seeds: Contributes additional fiber and a subtle crunch.
2 tablespoons chopped roasted peanuts: Makes the mixture crunchier and enhances the peanut flavor.
1 tablespoon unsweetened cocoa powder: Creates a chocolate-peanut butter combination.
1–2 tablespoons raisins or chopped dates: Adds fruity sweetness and a chewy texture.
1 tablespoon hemp seeds: Provides a mild nutty taste and additional nutrients.
Avoid adding too many dry ingredients at once, as this can make the mixture crumbly. If you include several optional ingredients, adjust the milk or peanut butter slightly as needed.
Equipment Needed
You do not need special baking equipment for this recipe.
Prepare a medium or large mixing bowl, a sturdy spoon or silicone spatula, measuring cups and spoons, a small plate or tray, parchment paper, and an airtight storage container.
A food processor is optional. It can help create a finer oat texture, but the recipe works perfectly well without one.
If you are making bars instead of energy bites, use a small square container or baking pan lined with parchment paper.
Step-by-Step Instructions
Step 1: Prepare the Ingredients
Begin by gathering all your ingredients and placing them on the counter. Measure the peanut butter, rolled oats, honey or maple syrup, vanilla extract, cinnamon, ground flaxseed, and salt.
If your peanut butter has been refrigerated, allow it to soften slightly at room temperature. It should be easy to stir and combine with the other ingredients.
If the peanut butter has separated in the jar, mix it thoroughly before measuring. The natural oil should be evenly incorporated so the finished mixture does not become excessively dry or oily.
If you prefer smaller pieces of oats, pulse them in a food processor for a few seconds. Do not turn them into a fine powder unless you specifically want a smoother texture.
Step 2: Mix the Peanut Butter and Sweetener
Add the peanut butter to your mixing bowl.
Pour in the honey or maple syrup and add the vanilla extract. Stir slowly until the mixture becomes smooth and evenly combined.
At first, the peanut butter may feel thick and sticky. Continue mixing until the sweetener is fully incorporated.
The mixture should look creamy and glossy. If your peanut butter is especially thick, you can add one tablespoon of milk to make it easier to stir.
Avoid adding too much liquid at this stage. The oats and ground flaxseed will absorb moisture later, and the mixture should remain thick enough to shape.
Step 3: Add the Dry Ingredients
Add the rolled oats, ground flaxseed, cinnamon, and salt to the peanut butter mixture.
Using a sturdy spoon or spatula, fold everything together until the oats are coated.
Scrape the sides and bottom of the bowl as you mix. This helps distribute the peanut butter evenly and prevents dry pockets from forming.
Continue mixing until the oats are incorporated and the mixture begins to hold together when pressed with the spoon.
If you are adding chocolate chips, coconut, chia seeds, chopped peanuts, or another optional ingredient, fold it in at this stage.
Step 4: Check the Consistency
Before shaping the mixture, check whether it has the correct texture.
Take a small amount between your fingers and press it gently.
The mixture should hold together without crumbling apart, but it should not feel excessively wet or sticky.
If the mixture is too dry, add milk one tablespoon at a time. Stir thoroughly after each addition before deciding whether more liquid is needed.
If the mixture is too sticky, add one or two tablespoons of rolled oats. Mix again and allow the oats a few minutes to absorb moisture.
If the mixture seems oily, the peanut butter may have been insufficiently stirred. Add a small amount of oats and mix thoroughly. Chilling the mixture can also help it become firmer.
Remember that natural peanut butter varies considerably between brands. A small adjustment is normal and does not mean the recipe has gone wrong.
Step 5: Let the Mixture Rest
Allow the mixture to rest for approximately five minutes.
During this time, the oats and ground flaxseed absorb some of the moisture, making the mixture easier to handle.
After resting, stir the mixture once more and check the consistency.
If it is still too soft to shape, place the bowl in the refrigerator for 10–15 minutes. Chilling makes the peanut butter firmer and reduces sticking when you form the treats.
Step 6: Shape the Energy Bites
Scoop out approximately one tablespoon of the mixture for each bite.
Roll it gently between your palms until it forms a small ball. If the mixture sticks to your hands, chill it a little longer or lightly dampen your palms with water.
Place each finished ball on a parchment-lined plate or tray.
Continue until all the mixture has been used. Depending on the size of your portions, you should obtain approximately 16 small bites.
Try to make the bites relatively uniform in size. This helps them chill evenly and makes portioning easier.
If you do not want to roll individual balls, press the mixture into a small lined container instead. Use the back of a spoon or a spatula to flatten the surface evenly.
Step 7: Chill Until Firm
Place the tray or container in the refrigerator for at least 30 minutes.
Chilling helps the peanut butter firm up and allows the oats to absorb moisture more completely. The finished bites will become easier to handle and will hold their shape better.
For firmer bars, refrigerate for approximately 45–60 minutes before cutting.
If you are in a hurry, you can place the bites in the freezer for about 15–20 minutes. Avoid leaving them there too long unless you intend to store them frozen.
Step 8: Serve and Enjoy
Once the bites have firmed up, transfer them to a serving plate or airtight container.
Enjoy them chilled or allow them to sit at room temperature briefly if you prefer a softer texture.
These peanut butter bites pair well with fresh fruit, plain yogurt, or a glass of milk. They can also be served as a small homemade dessert after lunch or dinner.
For an attractive finish, you can drizzle a little melted dark chocolate over the chilled bites and return them to the refrigerator until the chocolate sets.
How to Make Healthy No-Bake Peanut Butter Bars
If you prefer bars instead of energy balls, use the same ingredients and follow these instructions.
Line a small square pan or food-storage container with parchment paper, leaving a little overhang on the sides.
Prepare the peanut butter mixture as described above. Transfer it to the lined container and spread it evenly.
Press the mixture firmly into the corners using the back of a spoon or a spatula. Pay particular attention to the edges because loosely packed corners may crumble when you cut the bars.
For a compact texture, place another piece of parchment paper over the surface and press down gently with your hands.
Refrigerate for 45–60 minutes or until the mixture feels firm.
Lift the mixture out using the parchment paper and place it on a cutting board. Cut it into eight bars or sixteen smaller squares using a sharp knife.
If the bars crumble when cutting, return them to the refrigerator for another 15 minutes. A slightly chilled mixture is generally easier to slice cleanly.
For extra flavor, spread a thin layer of melted dark chocolate over the surface before chilling. Let the chocolate set completely before cutting the bars.
How to Make a Chocolate Peanut Butter Version
Chocolate and peanut butter are a classic combination, and this recipe can easily be adapted to include both.
Add one tablespoon of unsweetened cocoa powder to the dry ingredients. Stir carefully so the cocoa is distributed evenly throughout the oats.
Because cocoa powder absorbs moisture, you may need to add another tablespoon of milk or a small amount of peanut butter to maintain the correct consistency.
For a sweeter chocolate flavor, include one or two tablespoons of dark chocolate chips.
Another option is to create a chocolate coating. Melt a small quantity of dark chocolate using short microwave intervals, stirring between each interval. Drizzle it over the shaped bites, then refrigerate until the chocolate becomes firm.
For a balanced flavor, choose chocolate that is not excessively sweet. The natural nuttiness of the peanut butter should remain noticeable.
How to Make a Naturally Sweeter Version
If you prefer a sweeter treat, you can adjust the recipe without adding large amounts of sweetener.
Use a ripe mashed banana in place of part of the honey or maple syrup. Start with two tablespoons of mashed banana and reduce the milk if necessary. This creates a softer mixture with a mild banana flavor.
You can also add one or two finely chopped dates. Dates provide natural sweetness and a caramel-like taste.
Another option is to add a small amount of cinnamon and vanilla. These ingredients enhance the perception of sweetness without requiring much additional sweetener.
Keep in mind that fruit-based versions generally have a softer texture and may not keep as long as the original recipe. Refrigerate them promptly and use them within a few days.
How to Make a Higher-Protein Version
Peanut butter already contributes some protein, but you can adjust the recipe to include additional protein-rich ingredients.
One option is to replace a small portion of the oats with powdered peanut butter. Mix the powdered peanut butter according to its package directions if necessary, and adjust the liquid gradually.
You can also add a tablespoon or two of hemp seeds.
Another possibility is to mix in a small quantity of plain protein powder. Start with one tablespoon and increase only if the mixture remains moist enough to shape.
Protein powders vary considerably in their sweetness, flavor, and absorbency. Some can make the mixture dry or chalky if too much is added.
If the mixture becomes crumbly, add a little peanut butter or milk until it holds together.
For a creamier result, you can serve a peanut butter bite alongside plain Greek yogurt rather than adding many extra ingredients to the mixture itself.
How to Make the Recipe Vegan
The recipe can easily be made vegan by using pure maple syrup instead of honey.
Choose dairy-free chocolate chips if you are including chocolate, and use unsweetened almond milk, soy milk, oat milk, or another suitable plant-based milk.
Check the ingredient labels on your peanut butter and other additions to ensure they meet your dietary preferences.
The basic mixture of peanut butter, oats, maple syrup, flaxseed, and cinnamon is naturally suitable for a vegan version when the selected products contain no animal-derived ingredients.
How to Make the Recipe Gluten-Free
Oats are naturally gluten-free, but they can become contaminated with wheat or other gluten-containing grains during harvesting or processing.
If you need a gluten-free recipe, use oats specifically labeled gluten-free.
Check the labels of your peanut butter, chocolate chips, flavorings, and other additions as well.
The recipe does not require wheat flour, so using certified gluten-free oats is usually the main adjustment needed.
How to Make the Recipe Without Added Sweetener
If you want a version without added honey, maple syrup, or refined sugar, use a ripe mashed banana or a small quantity of unsweetened applesauce.
Start with two tablespoons of mashed banana and add more only if necessary. Mix it with the peanut butter before adding the oats.
Because banana and applesauce contain water, you may need less milk. The resulting mixture will also be softer than the original recipe.
Refrigerate the finished bites promptly and store them in an airtight container.
This variation has a different texture and a shorter storage life, but it is a useful option if you prefer the sweetness of fruit rather than a liquid sweetener.
Tips for Perfect No-Bake Peanut Butter Treats
Choose the Right Peanut Butter
Natural peanut butter with a simple ingredient list works especially well. Peanut butter made primarily from peanuts provides the strongest natural peanut flavor.
Smooth peanut butter produces a more uniform texture, while crunchy peanut butter creates little pockets of nutty crunch.
If your peanut butter contains added sugar or oil, the finished mixture may be sweeter or softer than expected. Adjust the oats and milk gradually.
Use Rolled Oats for Better Texture
Rolled oats provide structure without making the bites overly dense.
Quick oats absorb moisture more quickly and create a softer texture. If you use them, begin with slightly less liquid and adjust as needed.
Steel-cut oats are not recommended for this no-bake recipe because they remain hard and chewy without cooking.
Measure the Sweetener Carefully
Honey and maple syrup contribute both sweetness and moisture.
Adding too much can make the mixture sticky and difficult to shape. Begin with the stated quantity, taste the mixture, and adjust only if needed.
Do Not Add All the Milk Immediately
The moisture requirements depend on your peanut butter, oats, and optional ingredients.
Adding milk gradually gives you better control over the final texture.
Press the Mixture Firmly When Making Bars
Loose packing is one of the most common reasons homemade no-bake bars crumble.
Press the mixture firmly into the container and chill it thoroughly before slicing.
Give the Mixture Enough Time to Chill
The bites may seem soft immediately after shaping. This is normal.
Refrigeration allows the oats to absorb moisture and the peanut butter mixture to become firmer.
Avoid Excessive Additions
Nuts, seeds, dried fruit, and chocolate chips all add flavor, but too many additions can interfere with the mixture’s ability to hold together.
Choose two or three complementary additions rather than adding everything at once.
Common Problems and Their Solutions
Why Is My Mixture Too Dry?
The peanut butter may be thick, the oats may have absorbed too much moisture, or you may have added too many dry ingredients.
Add milk one tablespoon at a time and mix thoroughly. If the mixture still crumbles, add a little more peanut butter.
Why Is My Mixture Too Sticky?
Too much honey, maple syrup, or milk can make the mixture sticky.
Add a small amount of rolled oats, mix, and let the mixture rest for several minutes. Refrigeration can also help.
Why Do My Energy Bites Fall Apart?
The mixture may be too dry or insufficiently compressed.
Add a little peanut butter or milk, then roll the mixture firmly into balls. Make sure you chill the finished bites before serving.
Why Are My Bars Too Soft?
They may need more chilling time, or the mixture may contain too much liquid.
Refrigerate them longer before cutting. If they remain soft, keep them chilled and use a spoon to serve them as a peanut butter oat dessert.
Why Do My Bites Taste Too Salty?
Your peanut butter may already contain salt.
Next time, omit the additional salt. You can also balance the flavor with a small amount of extra oats and a little sweetener, depending on the consistency.
Why Is the Peanut Butter Flavor Too Strong?
Natural peanut butter has a concentrated roasted peanut flavor.
Add a little extra vanilla, cinnamon, or oats to balance it. A small quantity of dark chocolate can also complement the flavor.
Serving Suggestions
Healthy no-bake peanut butter bites can be enjoyed in many different ways.
Serve one or two alongside a bowl of plain yogurt and fresh berries for a convenient breakfast or snack.
Pair them with apple slices or banana pieces for a combination of creamy, crunchy, and fruity textures.
For a dessert plate, arrange the bites with strawberries and a few pieces of dark chocolate.
You can also crumble a bite over plain yogurt or oatmeal for additional peanut butter flavor.
If you prefer a more indulgent dessert, dip the chilled bites halfway into melted dark chocolate and allow the coating to set before serving.
For lunchboxes, pack the bites in a small food-safe container and keep them cool when necessary.
Remember that portion size and nutritional content depend on the ingredients used. Although these bites contain nutritious ingredients, peanut butter is energy-dense, and the treats should be enjoyed as part of a varied diet.
Storage Instructions
Refrigerator Storage
Place the finished bites or bars in an airtight container and refrigerate them.
The original recipe generally keeps well for approximately one week when properly refrigerated and handled with clean utensils.
If you add fresh banana, applesauce, dairy-based ingredients, or other perishable additions, use them sooner and follow appropriate food-storage guidance.
Keep the container closed to prevent the bites from absorbing refrigerator odors or drying out.
Freezer Storage
These peanut butter bites are suitable for freezing.
Arrange them in a single layer on a tray and freeze until firm. Transfer them to a freezer-safe airtight container or bag.
Place parchment paper between layers to prevent sticking.
For best quality, use them within approximately two to three months.
To serve, transfer the required quantity to the refrigerator and allow it to thaw until soft enough to eat. Small bites may also be left at room temperature briefly, provided they are handled safely.
Do not repeatedly thaw and refreeze the entire batch.
Room Temperature Storage
Because the recipe contains no baking step and may include ingredients that require refrigeration, refrigerator storage is the preferred option.
Avoid leaving the bites out for extended periods, especially in warm conditions. If you pack them for travel or school, use an insulated container with a cold pack when needed.
Nutrition Information
The following is an approximate estimate for one small energy bite when the recipe is divided into 16 portions using peanut butter, rolled oats, honey, flaxseed, vanilla, and cinnamon.
Calories: Approximately 115–135
Protein: Approximately 4–5 grams
Carbohydrates: Approximately 10–13 grams
Fat: Approximately 7–9 grams
Fiber: Approximately 1.5–2.5 grams
Sugar: Varies according to the peanut butter and sweetener used.
These figures are estimates rather than laboratory measurements. Exact values depend on the brands, ingredient quantities, and portion sizes.
Peanut butter contributes protein and predominantly unsaturated fats. Oats contribute carbohydrates and fiber, while flaxseed adds fiber and plant-based fats.
Using less sweetener may reduce the added sugar, but it can also change the texture. Optional chocolate, dried fruit, seeds, and coconut will change the nutritional values.
Frequently Asked Questions
Can I make healthy no-bake peanut butter bites without oats?
Yes. You can replace some or all of the oats with finely ground nuts, unsweetened shredded coconut, or another suitable dry ingredient.
However, oats provide much of the structure, so substitutions may require adjustments to the peanut butter and liquid. Start with small quantities and check whether the mixture holds together.
Can I use crunchy peanut butter?
Yes. Crunchy peanut butter works well and creates a more textured result.
If the mixture becomes too dry because the peanut butter is thick, add milk gradually until it can be shaped.
Can I use quick oats?
Yes. Quick oats are suitable, but they absorb moisture more quickly and may produce a softer texture.
Begin with the stated quantity and add liquid only if needed.
Can I make these bites the night before?
Absolutely. Prepare the mixture, shape the bites, and refrigerate them in an airtight container overnight.
They will be ready to serve the following day.
Are these peanut butter bites suitable for breakfast?
They can be part of a convenient breakfast, particularly when paired with fruit, yogurt, or another food that provides additional nutrients.
For a more substantial breakfast, serve them alongside a source of protein and some fresh fruit.
Can I make them without a food processor?
Yes. A mixing bowl and spoon are sufficient.
A food processor is useful only if you want to grind the oats into smaller pieces or create a smoother mixture.
Can I use almond butter instead of peanut butter?
Yes. Almond butter can replace peanut butter in equal quantities.
Depending on the brand, almond butter may be thicker or more liquid, so you may need to adjust the oats or milk slightly.
Sunflower seed butter is another possible alternative for people avoiding peanuts, although the flavor and texture will differ.
Can I add protein powder?
Yes. Add a small amount at first because protein powder can absorb moisture and make the mixture dry.
Increase the amount gradually and add a little milk or peanut butter if necessary. The final protein content will depend on the type and quantity of powder used.
Do these bites need to be baked?
No. All the ingredients are mixed together and chilled.
Use ingredients that are ready to eat as sold, including ready-to-eat oats, and store the finished treats appropriately.
Can I reduce the honey or maple syrup?
Yes. You can reduce the sweetener slightly, but it also contributes moisture and helps the mixture hold together.
If you reduce it, you may need a little additional peanut butter or milk to achieve the correct consistency.
Can I make the recipe nut-free?
The recipe as written contains peanut butter and is not suitable for someone who must avoid peanuts.
For a peanut-free version, use an appropriate seed butter, such as sunflower seed butter, and check all ingredient labels for allergen cross-contact. Anyone with a serious allergy should follow their healthcare professional’s advice and the relevant product safety information.
Final Thoughts
Healthy no-bake peanut butter bites are a simple homemade treat that combines the creamy richness of peanut butter with the hearty texture of oats and the gentle sweetness of honey or maple syrup.
The recipe is easy to customize, requires no oven, and can be prepared in advance for convenient snacks throughout the week. Whether you shape the mixture into energy balls, press it into bars, add dark chocolate, or experiment with different seeds and spices, the basic method remains simple.
For the best results, choose good-quality peanut butter, add liquid gradually, press the mixture firmly when making bars, and allow enough time for chilling.
Keep the finished treats refrigerated, serve them alongside fruit or yogurt when you want a more complete snack, and enjoy them as one delicious part of a balanced eating routine.
Make the ingredient list more preciseAdd a single definitive recipe method


