admin1
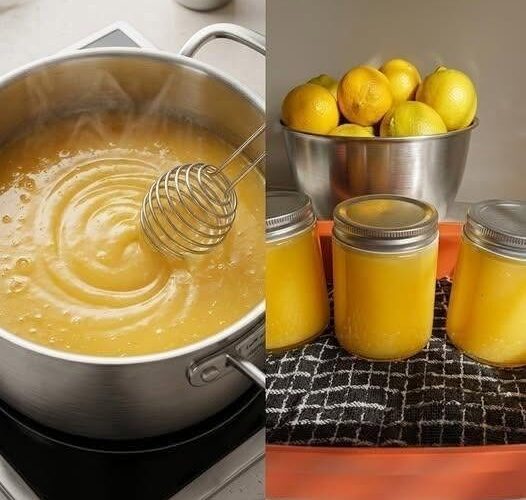
Homemade Lemon Curd: A Very Detailed, Easy, Creamy, and Tangy Recipe
Homemade lemon curd is a smooth, creamy, buttery, and beautifully tangy lemon spread made with fresh lemons, eggs, sugar, and butter. It has a bright yellow colour, a refreshing citrus flavour, and a rich texture that feels silky on the tongue. Unlike many store-bought lemon spreads, homemade lemon curd allows you to control the sweetness, tartness, thickness, and richness according to your personal taste.
Lemon curd is a wonderful addition to breakfast, afternoon tea, desserts, cakes, cupcakes, biscuits, pancakes, waffles, cheesecakes, and many other sweet treats. It can also be served with freshly baked scones, spread between cake layers, spooned over yoghurt, or used as a filling for lemon tarts.
The best part about making lemon curd at home is that you do not need any special equipment or complicated ingredients. With fresh lemons, a saucepan or heatproof bowl, a whisk, and a little patience, you can prepare a delicious homemade lemon curd that tastes fresh, balanced, and luxurious.
This detailed recipe explains everything from choosing the best lemons to preparing the ingredients, cooking the curd gently, achieving the perfect consistency, avoiding common mistakes, storing the finished spread, and using it in different desserts.
Recipe Overview
Preparation time: 15–20 minutes
Cooking time: 10–20 minutes
Cooling time: 1–2 hours
Total time: Approximately 1 hour 30 minutes to 2 hours, including cooling
Yield: Approximately 2 cups of lemon curd, depending on the amount of liquid and how much the mixture reduces
Difficulty level: Easy to moderate
Cooking method: Gentle stovetop cooking
Texture: Smooth, creamy, thick, and spreadable
Flavour: Sweet, buttery, fresh, and tangy
Best uses: Toast, scones, cakes, cupcakes, biscuits, pancakes, waffles, tarts, cheesecakes, and dessert fillings
Ingredients for Homemade Lemon Curd
To make a rich and flavourful homemade lemon curd, prepare the following ingredients before beginning.
Fresh lemons
You will need 3–4 medium-sized fresh lemons, depending on their juiciness.
Fresh lemons are the most important ingredient in this recipe because they provide the characteristic citrus flavour, refreshing aroma, and natural acidity that make lemon curd so delicious.
Choose lemons that feel heavy for their size, have smooth or slightly textured yellow skin, and feel firm when gently pressed. Heavy lemons generally contain more juice, making them a good choice for this recipe.
Wash the lemons thoroughly under running water before using them. Since the zest will be included in the curd, removing dirt and residue from the peel is particularly important.
You will need approximately 120 ml of freshly squeezed lemon juice and 1–2 tablespoons of finely grated lemon zest.
The exact amount of juice obtained will depend on the size and juiciness of your lemons. If your lemons are small or dry, you may need an additional lemon.
Granulated sugar
Use 150–200 grams of granulated white sugar.
Sugar balances the sharp acidity of the lemon juice and helps create the characteristic sweet-and-tangy flavour of lemon curd.
For a more tart lemon curd, use approximately 150 grams of sugar. For a sweeter, milder version, use around 180–200 grams.
Fine granulated sugar dissolves easily and works well in this recipe. Avoid using large amounts of powdered sugar because it may contain added starch or other ingredients that can affect the final texture.
Eggs
You will need 3 large eggs.
Eggs are essential for thickening lemon curd. Their proteins gradually set as the mixture heats, transforming the thin mixture of lemon juice, sugar, and butter into a creamy, spoonable spread.
Use fresh eggs and crack them into a separate bowl before adding them to the other ingredients. This allows you to check that the eggs are in good condition and remove any small pieces of eggshell.
For a slightly richer version, you can replace one whole egg with two additional egg yolks, but the main recipe works beautifully with three whole eggs.
Unsalted butter
Use 100–115 grams of unsalted butter, cut into small cubes.
Butter gives lemon curd its smooth texture, rich mouthfeel, and delicate creamy flavour. It also helps balance the sharpness of the lemon juice.
Unsalted butter is recommended because it allows you to control the amount of salt in the recipe.
Cold or slightly cool butter cut into small cubes works well because it melts gradually when added to the warm mixture. You can also use softened butter, although cold cubes are convenient for this method.
Salt
Use a small pinch of salt.
Salt is optional, but it helps balance the sweetness and brings out the fresh citrus flavour. You do not need much; a small pinch is sufficient.
Optional vanilla extract
You may add ¼ teaspoon of pure vanilla extract if you want a softer, more rounded flavour.
Vanilla is not essential for traditional lemon curd, and many people prefer to leave it out so that the fresh lemon flavour remains the main attraction.
Equipment You Will Need
You do not need expensive kitchen equipment to prepare homemade lemon curd.
A medium-sized heatproof bowl or a small, heavy-bottomed saucepan is suitable for cooking the mixture. A stainless-steel saucepan is a good choice because it distributes heat reasonably evenly when used over a low flame.
You will also need a whisk, a fine grater or zester, a citrus juicer, a measuring jug, measuring spoons, a silicone spatula, and a fine-mesh sieve.
A clean, heatproof glass jar with a lid is useful for storing the finished lemon curd.
If you want an especially smooth result, the fine-mesh sieve is helpful for removing small pieces of lemon zest, tiny strands of egg, or any accidental lumps.
Step 1: Prepare the Lemons Properly
Begin by washing your lemons thoroughly under cool running water. Rub the skin gently with your hands to remove any dirt.
Dry the lemons completely with a clean kitchen towel.
Before cutting the lemons, grate the zest from their yellow outer skin. Use the fine side of a grater or a citrus zester to remove only the thin yellow layer.
Avoid grating too deeply into the white layer underneath the skin. This white layer is called the pith, and it can taste bitter. Too much pith may give your finished lemon curd an unpleasant bitterness that competes with the fresh citrus flavour.
For this recipe, approximately 1–2 tablespoons of finely grated zest will provide a lovely lemon aroma.
Once you have collected the zest, cut the lemons in half and squeeze out the juice.
Pour the juice through a small strainer to remove seeds and large pieces of pulp. Small amounts of pulp are not necessarily a problem, but removing the seeds is important.
Measure approximately 120 ml of lemon juice.
If you have more juice than you need, set the extra aside for another recipe. If you have less, squeeze another lemon until you have the required amount.
Freshly squeezed juice is recommended because it provides the bright, natural flavour that makes homemade lemon curd special.
Step 2: Prepare the Eggs and Sugar
Place the three eggs in a medium-sized heatproof bowl if you plan to use the double-boiler method.
Add the measured sugar and whisk the ingredients together.
Continue whisking for approximately 30–60 seconds, or until the mixture looks evenly combined.
You do not need to whip the eggs into a thick foam. The goal is simply to combine the eggs and sugar thoroughly so that the sugar begins dissolving and the mixture becomes uniform.
Add the freshly grated lemon zest and whisk again.
The zest may appear as tiny yellow flecks throughout the mixture. These flecks contain aromatic oils that provide much of the distinctive lemon fragrance.
At this stage, the mixture will still be relatively thin. That is completely normal.
The thickening will occur later as the eggs gently cook.
Step 3: Add the Lemon Juice
Slowly pour the freshly squeezed lemon juice into the egg-and-sugar mixture while whisking continuously.
Continue whisking until the liquid looks smooth and evenly combined.
The mixture may become thinner after the lemon juice is added. Do not worry about this change.
Lemon juice contains acid, and when it is combined with eggs, it changes the way the mixture behaves during cooking. Gentle heat and continuous stirring will help the eggs thicken the liquid without forming noticeable curds.
Add the pinch of salt and whisk again.
If you are using vanilla extract, it is generally best to add it near the end of cooking so that its aroma remains pleasant and noticeable.
Before moving to the next step, make sure the mixture contains no visible streaks of egg white or dry sugar.
Step 4: Choose Your Cooking Method
There are two useful ways to cook lemon curd.
The first method uses a double boiler, which provides gentle, indirect heat. This is especially helpful for beginners because it reduces the risk of overheating the eggs.
The second method uses a heavy-bottomed saucepan directly over a low flame. This method is faster but requires more attention.
Both methods can produce excellent lemon curd when the mixture is stirred consistently and heated gently.
Method A: Double-Boiler Method
Fill a saucepan with approximately 2–5 cm of water.
Place the saucepan over medium heat and allow the water to reach a gentle simmer. It should produce steam and small bubbles rather than a vigorous rolling boil.
Set the heatproof bowl containing the lemon mixture over the saucepan.
The bottom of the bowl should not touch the water. The steam rising from the water will warm the bowl and cook the mixture gently.
Begin whisking the lemon mixture continuously.
Move the whisk around the entire bowl, including the sides and bottom, so that no part of the mixture remains stationary for too long.
Continue cooking until the mixture begins to thicken. This usually takes approximately 8–15 minutes, although the exact time depends on the heat level, bowl size, and quantity of ingredients.
At first, the mixture may appear almost unchanged. Gradually, however, it will become slightly thicker and begin coating the whisk.
Keep the water at a gentle simmer throughout the process. If it boils too vigorously, reduce the heat.
The double-boiler method is particularly useful when you want a smooth, delicate curd with minimal risk of scrambled egg pieces.
Method B: Direct Saucepan Method
If you prefer to cook the lemon curd directly in a saucepan, choose a small, heavy-bottomed pan.
Pour the prepared lemon mixture into the saucepan and place it over low heat.
Begin stirring immediately with a whisk or heatproof spatula.
Continue stirring without long interruptions, making sure to scrape the bottom and corners of the pan.
The mixture may heat more quickly than it would over a double boiler, so pay close attention to its texture.
If you notice the mixture thickening rapidly around the edges, lower the heat and stir more thoroughly.
Avoid allowing the mixture to boil vigorously. High heat can cause the eggs to coagulate into small pieces, resulting in a grainy texture.
Continue cooking until the curd is thick enough to coat the back of a spoon.
For beginners, the double-boiler method is the more forgiving option. However, if you use a low flame and stir continuously, the direct saucepan method can also work very well.
Step 5: Understand When Lemon Curd Is Ready
Knowing when to stop cooking is one of the most important parts of this recipe.
Lemon curd usually thickens gradually rather than suddenly becoming firm.
During the first few minutes, the mixture will resemble a thin lemon-coloured liquid. As the eggs warm, the mixture will begin to look smoother and slightly more opaque.
After several more minutes, it will start coating the whisk and the back of a spoon.
When you lift the whisk, the mixture should fall in a thicker stream rather than running off like water.
You can also perform the spoon test.
Dip a clean spoon into the curd and lift it out. If the mixture coats the back of the spoon, draw a line through the coating with your finger after allowing the spoon to cool enough to handle safely.
If the line remains visible instead of immediately filling with liquid, the curd has thickened considerably.
For a more precise check, use a clean food thermometer. A temperature around 170–175°F, or 77–79°C, is a useful target for many lemon curd recipes.
The curd should thicken without boiling. Avoid overheating it, because excessive heat can cause the eggs to form lumps.
Remember that lemon curd will become thicker as it cools, so it does not need to be extremely firm while it is still hot.
Step 6: Add the Butter
Once the lemon mixture has thickened, remove it from the heat.
Add the butter cubes gradually, a few pieces at a time.
Whisk after each addition until the butter begins melting into the warm curd.
Continue adding the remaining butter and whisk until the mixture becomes glossy and smooth.
The butter enriches the curd and gives it its characteristic silky texture.
At first, the butter may appear as separate yellow pieces floating in the mixture. Continue whisking, and it should gradually blend into the warm liquid.
If the mixture is too cool to melt the butter completely, return the bowl briefly to gentle heat while stirring. Avoid heating it aggressively.
When all the butter has melted, the curd should look creamy and uniform.
If you want to add vanilla extract, stir it in now.
Taste a small amount once it has cooled enough to taste safely. If you enjoy a sharper lemon flavour, you can use the zest to increase the citrus aroma in future batches. Avoid adding large quantities of extra lemon juice at this late stage, because it can alter the consistency.
Step 7: Strain the Lemon Curd for a Silky Finish
Place a fine-mesh sieve over a clean heatproof bowl.
Carefully pour the warm lemon curd through the sieve.
Use a silicone spatula to gently move the mixture through the mesh.
This step removes larger pieces of lemon zest and any small egg particles that may have formed during cooking.
Although straining is optional, it is highly recommended if you want a professional-looking finish.
Do not force large lumps through the sieve. If any cooked egg pieces remain, leave them behind.
The strained curd should have a smooth, glossy appearance and a rich lemon-yellow colour.
If you prefer a more rustic homemade texture, you can skip straining and keep the finely grated zest in the curd.
Both versions can be delicious; the choice depends on whether you prefer a completely smooth spread or a more noticeable citrus texture.
Step 8: Cool the Lemon Curd Correctly
Allow the finished curd to cool for approximately 10–15 minutes at room temperature before transferring it to a suitable clean container.
Do not leave it sitting out for an extended period. Homemade lemon curd contains eggs and butter, so it should be refrigerated promptly.
If you want to prevent a thin skin from forming on the surface, press a piece of food-safe plastic wrap directly against the surface of the curd while it cools.
Alternatively, stir the curd occasionally during the initial cooling period.
Transfer the curd to a clean, heatproof jar or food-storage container. Leave a little space at the top rather than filling the container completely.
Allow the container to cool briefly, then refrigerate it promptly.
As the lemon curd chills, its butter firms and the mixture becomes thicker.
For the best consistency, let it chill for at least 2 hours before serving. Overnight refrigeration often gives it an even better spreadable texture.
Do not judge the final thickness while the curd is still warm. Warm lemon curd is naturally softer than chilled lemon curd.
Step 9: Check the Final Texture
After the curd has chilled, open the container and stir it gently with a clean spoon.
The finished lemon curd should be thick enough to hold its shape briefly when spooned onto a plate, yet soft enough to spread easily over toast or cake.
It should feel smooth and creamy rather than rubbery or jelly-like.
Its colour will depend on the lemons, eggs, and butter used. It may range from pale yellow to a deeper golden yellow.
The flavour should be sweet and buttery at first, followed by a refreshing lemon tang.
If the curd is very sour, you may prefer a slightly sweeter batch next time. If it tastes too sweet, reduce the sugar moderately in your next batch.
If it seems slightly thin after refrigeration, it may need more cooking in the next batch. Remember that lemon curd thickens as it cools, so always allow enough chilling time before deciding that something went wrong.
Tips for the Best Homemade Lemon Curd
Use fresh lemon juice
Fresh lemon juice gives the curd a bright and natural citrus flavour.
Bottled lemon juice may work in some recipes, but its flavour can be less fresh or more acidic in character. For the best results, use freshly squeezed juice.
Grate only the yellow lemon peel
The yellow outer skin provides aromatic lemon oils.
The white pith underneath can add bitterness, so use a light hand when zesting.
Cook slowly
Gentle heat gives the eggs time to thicken the mixture gradually.
If the mixture becomes too hot too quickly, the eggs may coagulate into small pieces.
Stir continuously
Keep the whisk or spatula moving, particularly when using a direct saucepan method.
Stirring distributes the heat and helps prevent the mixture from sticking to the bottom.
Use a heavy-bottomed pan
A heavy-bottomed saucepan generally distributes heat more evenly than a very thin pan.
This makes it easier to control the cooking process.
Add the butter after thickening
Adding the butter after the egg-and-lemon mixture has thickened helps you control the final texture and makes it easier to judge when the eggs are ready.
Strain for smoothness
Straining removes any unwanted lumps and produces a more refined finish.
Chill before serving
Lemon curd becomes thicker and more spreadable after refrigeration.
Give it sufficient time to cool before using it as a cake filling or dessert topping.
Common Lemon Curd Problems and How to Fix Them
Problem: The lemon curd is too thin
Lemon curd may remain thin if it has not cooked long enough or if the ingredient proportions contain too much liquid.
First, refrigerate it for at least 2 hours because cooling helps it firm up.
If it is still too thin, transfer it to a heatproof bowl and gently reheat it over a double boiler while whisking continuously. Continue cooking until it thickens further, then cool and refrigerate it again.
Do not add flour or large quantities of cornstarch as a quick fix, because this changes the traditional texture and flavour.
Problem: The lemon curd has small lumps
Small lumps usually develop when the eggs become too hot or the mixture is not stirred consistently.
If the lumps are minor, straining the curd through a fine-mesh sieve may improve its texture.
If the mixture has become heavily scrambled, straining may remove some of the cooked egg, but it cannot always restore the original creamy consistency.
Next time, reduce the heat, stir continuously, and use a double boiler.
Problem: The lemon curd tastes bitter
Bitterness often comes from grating too deeply into the white pith of the lemon.
It can also result from using unusually bitter lemons or adding excessive zest.
Use only the yellow outer peel and measure the zest carefully.
A small amount of additional sugar may soften mild bitterness, although it will not completely remove a strong bitter flavour.
Problem: The lemon curd tastes too sour
Some lemons are naturally more acidic than others.
If you prefer a milder flavour, use the higher end of the suggested sugar range next time.
Do not add excessive sugar after cooking without considering the texture, because it may not dissolve evenly into cold curd.
Problem: The lemon curd tastes too sweet
Reduce the sugar slightly in the next batch, perhaps to 150 grams.
Keep in mind that reducing sugar substantially can affect the balance of flavour and the final texture.
Problem: The curd looks oily
An oily appearance may mean that the butter has separated from the mixture.
This can happen if the curd becomes too hot or if the butter is incorporated poorly.
Remove the mixture from the heat and whisk gently until it comes together again. If needed, use an immersion blender briefly, keeping the blender head submerged to reduce splashing.
If the separation is severe, the texture may not return completely to its original state.
Problem: The lemon curd is too firm after refrigeration
Butter firms in the refrigerator, so chilled lemon curd may seem quite thick.
Let a small portion sit at room temperature for approximately 5–10 minutes, then stir it gently.
It should become easier to spread without needing to be reheated.
Problem: The curd has a strong egg smell
An eggy flavour can develop if the eggs are overheated or if the lemon flavour is too weak to balance them.
Use fresh eggs, measure the lemon juice accurately, and cook gently.
A fine-mesh strainer can remove small cooked egg particles, but it will not completely correct a strongly overcooked mixture.
Delicious Variations of Homemade Lemon Curd
Once you have mastered the basic recipe, you can experiment with different citrus fruits and flavour combinations.
Extra-Tangy Lemon Curd
For a sharper citrus flavour, keep the sugar near the lower end of the suggested range and use the full amount of lemon zest.
The result will have a more pronounced lemon flavour that works particularly well in sweet pastries and cakes.
Avoid adding large quantities of extra juice without adjusting the recipe, because too much liquid may affect the consistency.
Sweeter Lemon Curd
For a sweeter version, use approximately 190–200 grams of sugar.
This variation is particularly suitable for children or anyone who prefers a gentler contrast between sweetness and acidity.
It works well as a filling for cupcakes, sandwich biscuits, and layered desserts.
Extra-Rich Lemon Curd
For a richer version, replace one whole egg with two additional egg yolks.
This produces a deeper yellow colour and a more custard-like texture.
Because egg yolks contain fat and emulsifying compounds, they contribute to the richness and smoothness of the finished curd.
Vanilla Lemon Curd
Add approximately ¼ teaspoon of vanilla extract after cooking.
Vanilla softens the sharp citrus flavour and gives the curd a delicate dessert-like aroma.
Use only a small quantity so that the lemon remains the dominant flavour.
Lime Curd
Replace the lemon juice and zest with freshly squeezed lime juice and finely grated lime zest in similar quantities.
Lime curd has a distinctively sharp, fragrant flavour that pairs beautifully with coconut desserts, sponge cakes, and biscuits.
The precise taste will vary according to the acidity of the limes.
Orange Curd
Use fresh orange juice and finely grated orange zest for a sweeter, milder citrus spread.
Because oranges are generally less acidic than lemons, an orange curd may have a softer flavour and can behave somewhat differently during cooking.
For a dependable result, use a recipe specifically developed for orange curd if you want to replace most or all of the lemon juice.
Lemon and Ginger Curd
Add a small amount of finely grated fresh ginger to the lemon mixture before cooking.
The ginger contributes a warm, gently spicy note that complements the bright citrus flavour.
Strain the finished curd to remove any larger pieces of ginger fibre.
Lemon and Passion Fruit Curd
Passion fruit adds a tropical fragrance and a distinctive sweet-tart taste.
For this variation, use a tested recipe that accounts for the additional fruit pulp and liquid. Adding passion fruit puree directly to the basic lemon curd recipe without adjusting the proportions can make the mixture too thin.
How to Use Homemade Lemon Curd
Homemade lemon curd is versatile enough to become a regular ingredient in your kitchen.
Spread it on toast
Spread a thin layer of chilled lemon curd over freshly toasted bread.
The warm toast softens the butter in the curd slightly, allowing it to spread easily.
You can serve it with plain toast, whole-wheat bread, brioche, or a freshly baked English muffin.
Serve it with scones
Lemon curd pairs beautifully with freshly baked scones.
Cut a scone in half and spread lemon curd over the inside. You can also serve it alongside whipped cream for an afternoon-tea-style treat.
Fill cupcakes
Once cupcakes have cooled completely, remove a small amount from the centre of each cupcake and fill the cavity with lemon curd.
Replace a small piece of cake over the filling if desired, then decorate with buttercream or whipped frosting.
Keep filled cupcakes refrigerated when required by the frosting and filling.
Add it between cake layers
Lemon curd can be used between layers of vanilla sponge cake, lemon cake, or almond cake.
For a stable layer cake, pipe a ring of firm buttercream around the edge of each layer before adding the curd inside the ring. This helps prevent the filling from escaping through the sides.
Avoid spreading the curd too close to the outer edge.
Make lemon curd yoghurt bowls
Spoon a little lemon curd over plain yoghurt and gently swirl it through the surface.
Add fresh berries, chopped nuts, or a small amount of granola for texture.
The creamy yoghurt balances the lemon curd’s sweetness and acidity.
Use it in lemon tarts
Lemon curd makes a convenient filling for small tart shells.
Bake the pastry shells according to the pastry recipe, allow them to cool, and fill them with chilled lemon curd.
For a traditional baked lemon tart, use a recipe designed specifically for baking the filling, as a curd prepared for spreading may not behave exactly like a baked tart custard.
Add it to pancakes and waffles
Spread lemon curd over warm pancakes or waffles.
You can serve it with sliced strawberries, blueberries, or banana for a refreshing breakfast or dessert.
Because lemon curd is rich and flavourful, a small spoonful often provides plenty of taste.
Make lemon curd parfaits
Layer lemon curd with plain yoghurt or whipped cream and crushed biscuits in small serving glasses.
Alternate the layers to create a simple dessert with different textures.
Refrigerate until serving, and add crunchy biscuit crumbs shortly before eating if you want them to remain crisp.
Fill sandwich biscuits
Spread a small amount of lemon curd between two plain biscuits or shortbread cookies.
The buttery biscuit flavour complements the tangy filling.
For the neatest result, chill the filled biscuits briefly before serving.
Make lemon curd cheesecake
Use lemon curd as a topping for a plain baked cheesecake or no-bake cheesecake.
Spread a thin layer over the chilled cheesecake and refrigerate until set.
You can also swirl small spoonfuls of curd into a cheesecake filling when following a recipe that supports this technique.
How to Store Homemade Lemon Curd Safely
Homemade lemon curd contains eggs and butter, so proper refrigeration is important.
Transfer the curd to a clean, airtight container and refrigerate it promptly at 40°F (4°C) or below.
For a conservative homemade storage guideline, use the curd within approximately 1 week. Some recipes recommend different storage periods depending on their ingredient ratios, cooking method, and handling practices, so follow any tested recipe-specific guidance when available.
Always use a clean spoon when serving the curd. Avoid dipping used utensils into the jar, because this can introduce food particles and microorganisms.
Do not leave lemon curd at room temperature for more than 2 hours in total, or more than 1 hour when the surrounding temperature is above 90°F (32°C).
Do not assume that the acidity of lemon juice makes homemade lemon curd safe to store at room temperature.
If the curd develops mould, an unusual smell, or another obvious sign of spoilage, discard it without tasting it.
Can You Freeze Lemon Curd?
Yes, lemon curd can generally be frozen.
Place it in a freezer-safe airtight container, leaving a little room for expansion. You can also freeze small portions in suitable freezer-safe containers.
Label the container with the preparation date and freeze it promptly.
For best quality, use frozen lemon curd within approximately 3 months.
Thaw it in the refrigerator rather than on the kitchen counter.
After thawing, stir the curd gently to restore its texture. Some separation may occur, but whisking can often help bring it together again.
Do not refreeze lemon curd that has been thawed and handled unless a reliable food-safety procedure specifically permits it.
Frequently Asked Questions
Can I make lemon curd without a double boiler?
Yes. You can prepare lemon curd directly in a heavy-bottomed saucepan over low heat.
The key is to stir continuously, scrape the bottom and sides, and avoid letting the mixture boil vigorously.
A double boiler is simply a more forgiving option for beginners.
Can I make lemon curd without butter?
Butter is an important part of the traditional recipe because it provides richness and a smooth mouthfeel.
You can find dairy-free lemon curd recipes that use alternative fats, but replacing the butter directly in this recipe may change the texture and flavour.
For a reliable dairy-free result, use a recipe developed specifically with a suitable dairy-free substitute.
Can I make lemon curd without eggs?
Traditional lemon curd relies on eggs to thicken the mixture.
Egg-free versions are possible, usually using starch or other thickening ingredients, but they have a different texture and may require a different cooking method.
Use a recipe specifically designed for egg-free lemon curd rather than simply leaving the eggs out.
Why is my lemon curd yellow?
The yellow colour comes from the egg yolks, butter, and natural pigments in the lemon zest.
The exact colour varies according to the ingredients used.
A pale yellow curd is just as normal as a deeper golden version.
Can I use bottled lemon juice?
Fresh lemon juice is recommended because it generally provides a brighter, fresher flavour.
Bottled lemon juice may work, but the flavour and acidity can vary between products.
If you use bottled juice, choose a plain product without added flavours and follow a tested recipe that permits it.
How long does lemon curd take to thicken?
It usually takes approximately 8–15 minutes over a double boiler, although the time can vary.
Direct saucepan cooking may be faster.
Use the consistency and temperature as your main guides rather than relying only on the clock.
Can I put hot lemon curd straight into the refrigerator?
Transfer it to a clean container, allow it to cool briefly, and refrigerate it promptly.
Do not leave it on the counter for several hours to reach room temperature.
If making a large batch, dividing it into smaller, shallow containers can help it cool more quickly.
Can I use lemon curd as cake frosting?
Lemon curd is generally too soft to use as a standalone piped frosting.
However, it works beautifully as a filling or as a flavouring ingredient in suitable buttercream recipes.
For a layered cake, use a stable border of frosting to hold the curd in place.
Is lemon curd the same as lemon jam?
No. Lemon curd is an egg-thickened citrus spread that usually contains butter, whereas lemon jam relies on fruit and sugar and is prepared using a different method.
Their textures, flavours, and storage requirements are different.
A Simple Preparation Schedule
If you are preparing lemon curd for a special dessert, a little planning makes the process easier.
First 10 minutes: Wash the lemons, zest them, squeeze the juice, and measure the ingredients.
Next 5 minutes: Whisk the eggs, sugar, lemon zest, and lemon juice together.
Next 10–15 minutes: Cook the mixture gently while whisking until it thickens.
Next 5 minutes: Add the butter, whisk until smooth, and strain if desired.
Next 10–15 minutes: Allow the curd to cool briefly before transferring it to a clean container and refrigerating it promptly.
Final 2 hours or longer: Chill the curd until it becomes thick and spreadable.
The actual time will depend on your equipment, cooking temperature, and the amount of curd you prepare.
Final Recipe Summary
For an easy homemade lemon curd, combine 3 large eggs, 150–200 grams of sugar, approximately 120 ml of fresh lemon juice, 1–2 tablespoons of lemon zest, and a pinch of salt. Cook the mixture gently over a double boiler while whisking continuously until it thickens and reaches approximately 77–79°C. Remove it from the heat, whisk in 100–115 grams of butter, and strain for an extra-smooth texture if desired.
Transfer the finished curd to a clean container, cool it briefly, and refrigerate it promptly. Chill for at least 2 hours before serving.
The result is a fresh, creamy, sweet-and-tangy lemon spread that can transform simple toast, cakes, biscuits, pastries, and desserts into something special.
Once you become comfortable with the basic technique, you can adjust the sweetness, experiment with different citrus fruits, and use your homemade lemon curd in countless delicious ways.