admin1
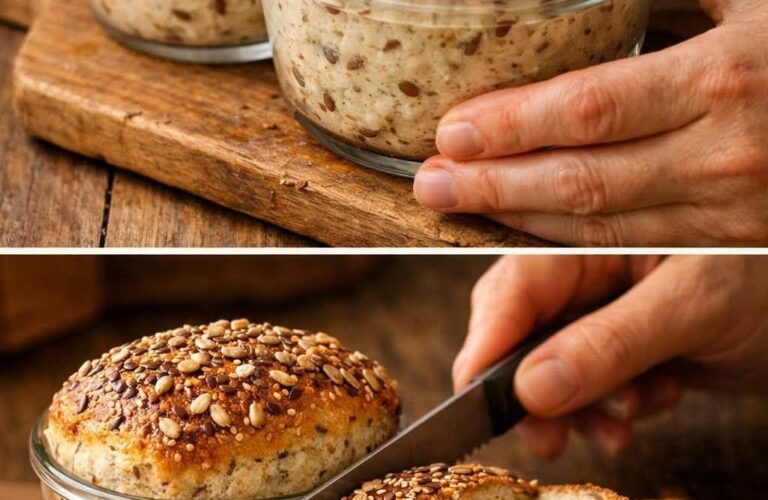
Seeded No-Knead Jar Bread
Seeded No-Knead Jar Bread is a rustic artisan-style bread made with a simple high-hydration dough, an assortment of nutritious seeds, and a long fermentation period that develops exceptional flavor and texture. The dough is mixed directly in a large glass jar or container, requiring no kneading and very little hands-on effort. During the slow rise, the yeast naturally develops structure and flavor, resulting in a loaf with a crisp crust, chewy crumb, and rich nutty taste from the seeds. This bread is ideal for beginners and experienced bakers alike because it relies on time rather than labor to create bakery-quality results.
Ingredients:
- 4 cups (500 g) bread flour
- 1 cup (125 g) whole wheat flour
- 2 teaspoons fine sea salt
- 1 teaspoon instant yeast
- 2 tablespoons honey
- 2½ cups (600 ml) lukewarm water
- 1 tablespoon olive oil
For the seed mixture:
- 3 tablespoons sunflower seeds
- 3 tablespoons pumpkin seeds
- 2 tablespoons sesame seeds
- 2 tablespoons flaxseeds
- 2 tablespoons chia seeds
- 1 tablespoon hemp seeds
For topping:
- 1 tablespoon sunflower seeds
- 1 tablespoon pumpkin seeds
- 1 tablespoon sesame seeds
- 1 teaspoon flaxseeds
Instructions:
Select a large glass jar, container, or bowl capable of holding at least three times the volume of the dough. The dough will expand significantly during fermentation, so adequate space is important.
In the jar, combine the bread flour, whole wheat flour, sea salt, and instant yeast. Stir thoroughly to distribute the ingredients evenly. Add the sunflower seeds, pumpkin seeds, sesame seeds, flaxseeds, chia seeds, and hemp seeds. Mix well so the seeds are dispersed throughout the flour mixture.
In a separate measuring jug, combine the lukewarm water, honey, and olive oil. Stir until the honey dissolves. Pour the liquid ingredients into the flour mixture.
Using a sturdy wooden spoon or spatula, stir until all dry ingredients are hydrated. The dough will appear shaggy, sticky, and wetter than traditional kneaded bread dough. Continue mixing for about 2 minutes until no dry flour remains. Scrape down the sides of the jar or container.
Cover the jar loosely with a lid, plastic wrap, or a clean kitchen towel. Leave the dough at room temperature for 12 to 18 hours. During this time, the dough will gradually expand, develop bubbles, and become airy. The surface should appear slightly domed and filled with small fermentation pockets.
The next day, lightly flour a work surface. Carefully scrape the dough from the jar onto the floured surface. Because the dough is highly hydrated, handle it gently to preserve the air bubbles created during fermentation.
Using floured hands, fold the edges of the dough toward the center several times to form a rough ball. Avoid kneading or aggressively handling the dough. The goal is to create shape while retaining as much trapped gas as possible.
Place a sheet of parchment paper in a bowl or proofing basket. Transfer the dough seam-side down onto the parchment. Cover loosely with a towel and allow the dough to rise for an additional 60 to 90 minutes. During this second rise, the dough will become noticeably puffier.
About 45 minutes before baking, place a Dutch oven with its lid into the oven and preheat to 450°F (230°C). The Dutch oven should heat thoroughly to create the steam environment necessary for a crisp artisan crust.
Shortly before baking, lightly mist the surface of the dough with water. Sprinkle the topping seeds evenly over the loaf and gently press them into the surface. If desired, use a sharp knife or bread lame to score the top of the dough with one or two shallow slashes. Scoring helps control expansion during baking.
Carefully remove the hot Dutch oven from the oven. Lift the dough using the parchment paper and lower it into the Dutch oven. Cover immediately with the lid.
Bake covered for 30 minutes. During this stage, the trapped steam helps the loaf expand dramatically and develop a glossy crust.
After 30 minutes, remove the lid and continue baking for 20 to 25 minutes. The bread should become a deep golden brown with a crisp, crackling crust. The seeds on top will toast and release a rich nutty aroma.
For an even darker crust, bake for an additional 5 minutes uncovered. Monitor closely to prevent excessive browning.
The bread is fully baked when it reaches an internal temperature of approximately 205–210°F (96–99°C). The loaf should sound hollow when tapped on the bottom.
Transfer the bread to a wire cooling rack and allow it to cool completely for at least 2 hours before slicing. This cooling period is essential because the crumb continues to set internally after baking.
When sliced, the bread should reveal an open, airy interior dotted with colorful seeds throughout the loaf. The texture should be pleasantly chewy with a crisp crust and a rich, nutty flavor.
For serving, enjoy the bread with butter, cream cheese, honey, jam, avocado, soups, stews, salads, or sandwiches. The seeds contribute texture and nutrition while complementing both sweet and savory toppings.
Storage Instructions:
Store the cooled bread in a paper bag, bread box, or loosely wrapped cloth at room temperature for up to 3 days. Avoid sealing it tightly while still warm, as trapped moisture may soften the crust.
For longer storage, slice the bread and freeze individual portions in airtight freezer bags for up to 3 months. Toast slices directly from frozen when needed.
Variations:
For a cranberry seed loaf, add ½ cup dried cranberries during mixing. The sweet-tart fruit pairs beautifully with the nutty seeds.
For a rosemary version, incorporate 1 tablespoon finely chopped fresh rosemary into the dough before fermentation.
For a multigrain loaf, replace 1 cup of bread flour with rolled oats, rye flour, or spelt flour.
For an extra-seeded loaf, roll the shaped dough in a mixture of sunflower, pumpkin, sesame, and flaxseeds before the final rise.
For a honey oat variation, increase the honey to 3 tablespoons and sprinkle rolled oats over the top before baking.
For a savory garlic loaf, mix 2 teaspoons garlic powder and 1 teaspoon dried thyme into the dry ingredients before adding the liquid.
For a rustic harvest loaf, combine sunflower seeds, pumpkin seeds, flaxseeds, chopped walnuts, and dried cranberries for a hearty autumn-inspired bread.
Helpful Baking Tips:
Use fresh yeast for the best fermentation and rise.
Allow sufficient fermentation time because flavor develops during the long rise.
Avoid adding too much extra flour when shaping the dough, as excess flour can make the loaf dense.
Preheating the Dutch oven thoroughly is critical for achieving maximum oven spring and crust development.
Handle the dough gently throughout shaping and proofing to preserve air pockets.
Cool the bread completely before slicing to prevent a gummy interior.
Toast leftover slices to revive the crust and enhance the flavor of the seeds.
The long fermentation, diverse seed blend, and no-knead method combine to create a deeply flavorful artisan loaf with minimal effort. Every slice offers a crisp crust, airy crumb, toasted seed crunch, and rich wheat flavor, making this Seeded No-Knead Jar Bread a versatile and satisfying bread suitable for breakfast, lunch, dinner, and everything in between. Its simplicity, nutritional value, and bakery-quality results make it a recipe worth returning to again and again.