 admin1
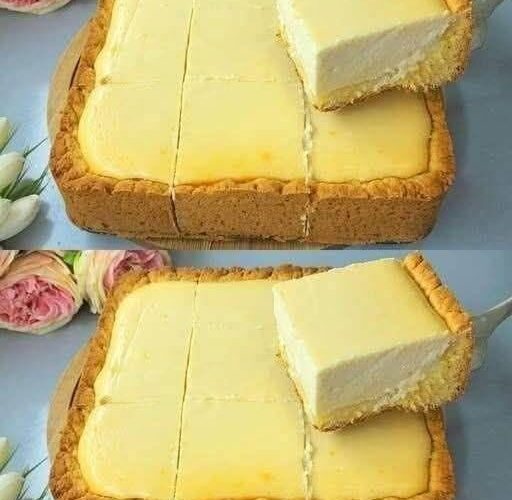
Torta della Nonna: The Ultimate Traditional Italian Grandma’s Custard Pie
Torta della Nonna is a traditional Italian dessert made with delicate, buttery shortcrust pastry, a rich and creamy lemon-scented custard filling, and a generous topping of golden pine nuts and powdered sugar. The name translates to “Grandmother’s Cake,” and the dessert is loved throughout Italy for its comforting homemade flavor, elegant appearance, and beautiful balance of textures.
This classic Tuscan dessert combines two wonderful elements: a tender pastry crust that melts in your mouth and a smooth pastry cream that tastes lightly of vanilla and lemon. The top pastry layer becomes delicately crisp in the oven, while the custard remains soft and creamy inside. Toasted pine nuts add a subtle buttery crunch, and a final dusting of powdered sugar gives the finished tart its traditional appearance.
Although Torta della Nonna looks like something you might find in an Italian bakery, it is entirely achievable in a home kitchen. The recipe does require a little patience because the pastry dough needs to chill and the custard must cool before the tart is assembled. However, each stage is straightforward, and preparing the components separately makes the entire process much easier.
This detailed recipe explains how to make authentic-style Torta della Nonna from scratch, including the pastry, the homemade custard, the traditional pine nut topping, the baking process, and all the practical tips needed to achieve excellent results.
What Is Torta della Nonna?
Torta della Nonna is a traditional Italian tart associated with Tuscany, particularly the areas around Florence and Arezzo. It is usually made with pasta frolla, which is an Italian sweet shortcrust pastry, and crema pasticcera, a thick custard prepared with milk, egg yolks, sugar, and starch.
The custard is enclosed between two layers of pastry. The upper layer is decorated with pine nuts, and the baked tart is traditionally finished with powdered sugar.
Unlike a cheesecake, this dessert does not depend on cream cheese. Unlike an American custard pie, it usually features a sweet, crumbly pastry that provides a distinct buttery flavor. Its filling is closer to Italian pastry cream, which is thick enough to slice neatly after cooling but remains pleasantly creamy when eaten.
There are variations from bakery to bakery. Some recipes flavor the custard with lemon zest, others emphasize vanilla, and some use a combination of both. A few versions include a thin layer of sponge cake or other additions, but this recipe follows the familiar homemade style with pastry, custard, pine nuts, and powdered sugar.
The most important characteristic is balance. The pastry should be tender rather than tough, the custard should be smooth rather than rubbery, and the pine nuts should contribute flavor without overpowering the filling.
Why You Will Love This Recipe
This Torta della Nonna recipe is designed to produce a traditional Italian dessert with a rich flavor and a beautiful presentation.
The homemade pastry has a delicate, buttery texture that contrasts wonderfully with the creamy custard. The filling is made from simple ingredients and receives its flavor from fresh lemon zest and vanilla. The pine nuts add a pleasant crunch, while powdered sugar provides a light, elegant finish.
Another advantage is that the dessert can be prepared ahead of time. In fact, allowing the tart to cool thoroughly improves the way it slices. This makes it an excellent choice for family gatherings, weekend desserts, dinner parties, or special occasions.
It is also a useful recipe to learn because both pasta frolla and crema pasticcera are important components in many Italian desserts. Once you understand how to prepare them, you can use the same techniques for fruit tarts, cream-filled pastries, and other traditional baked treats.
Recipe Overview
Preparation time: Approximately 45–60 minutes
Chilling time: Approximately 1 hour and 30 minutes to 2 hours
Cooking time: Approximately 45–55 minutes
Cooling time: At least 3–4 hours
Total time: Approximately 4–5 hours, including chilling and cooling
Servings: 10–12 slices
Difficulty: Intermediate
Cuisine: Italian
Course: Dessert
Recommended pan: A 23–24 cm (9–9½ inch) round tart pan with reasonably high sides or a removable base
Oven temperature: 175°C (350°F) conventional oven
Ingredients for Torta della Nonna
The ingredients are divided into three groups: the sweet pastry, the custard filling, and the topping. Keeping everything organized before you begin makes the recipe easier to follow and reduces the likelihood of mistakes.
Ingredients for the Italian Shortcrust Pastry
- 350 g all-purpose flour
- 150 g unsalted butter, cold and cut into small cubes
- 130 g granulated sugar
- 2 large egg yolks
- 1 whole large egg
- 1 teaspoon finely grated lemon zest
- 1 teaspoon vanilla extract
- ¼ teaspoon fine salt
- ½ teaspoon baking powder, optional
The butter should be cold when you begin mixing the pastry. Cold butter helps create a tender, crumbly texture rather than a greasy dough.
The flour provides the structure, while the sugar adds sweetness and contributes to the pastry’s golden color. Egg yolks enrich the dough, and the whole egg helps bind the ingredients together.
Lemon zest adds a delicate fragrance that complements the custard. Vanilla is optional in some traditional pastry recipes, but it works particularly well in this version.
The baking powder is optional. Some Italian-style homemade pastry recipes include a small amount to produce a slightly softer texture, while others rely entirely on the natural structure of the dough. If you prefer a more delicate, traditional shortcrust texture, you can leave it out.
Ingredients for the Homemade Custard Filling
- 750 ml whole milk
- 6 large egg yolks
- 150 g granulated sugar
- 60 g cornstarch
- 1 teaspoon vanilla extract
- Finely grated zest of 1 unwaxed lemon
- 25 g unsalted butter, optional
- A small pinch of salt
Whole milk produces a rich, smooth custard. Lower-fat milk can be used, but the finished filling may be slightly less creamy.
Egg yolks provide richness, color, and structure. Cornstarch thickens the custard and helps it remain stable when the tart is cut into slices.
The lemon zest is especially important because it gives the filling a fresh, fragrant character without making it sharply sour. Use only the yellow outer layer of the lemon peel, avoiding the bitter white pith beneath it.
Vanilla complements the lemon and gives the custard a rounded flavor. The optional butter can be stirred into the finished custard for extra richness and a silky texture.
Ingredients for the Pine Nut Topping
- 60–80 g pine nuts
- 1–2 tablespoons powdered sugar, for dusting
- A little additional lemon zest, optional
Pine nuts are the traditional topping for Torta della Nonna. They have a delicate, buttery flavor that becomes more pronounced when toasted in the oven.
You can use 60 g for a lighter topping or increase the amount to 80 g if you prefer more nuts on the surface.
Powdered sugar should be added after baking and cooling. If it is added before the tart goes into the oven, much of it will dissolve or brown, so the finished dessert will not have the same classic appearance.
Equipment You Will Need
Prepare the following equipment before starting:
- A 23–24 cm round tart pan
- A medium mixing bowl
- A large mixing bowl
- A medium heavy-based saucepan
- A whisk
- A wooden spoon or silicone spatula
- A rolling pin
- Baking parchment
- Plastic wrap or reusable food wrap
- A fine grater for lemon zest
- A kitchen scale
- A cooling rack
- A fine-mesh sieve, optional
- A pastry brush, optional
A removable-base tart pan makes serving easier because you can release the cooled tart without having to lift it out of a deep dish. If your pan does not have a removable base, line it carefully with parchment paper where practical.
A kitchen scale is particularly helpful for this recipe because accurate measurements improve the consistency of both the pastry and the custard.
Step 1: Prepare the Pastry Ingredients
Begin by measuring the flour, sugar, butter, eggs, lemon zest, vanilla, and salt.
Place the flour in a large mixing bowl. If you are using baking powder, mix it evenly into the flour.
Add the cold butter cubes. Using your fingertips, gently rub the butter into the flour until the mixture resembles coarse breadcrumbs.
Work relatively quickly so that the butter does not become too warm. The mixture does not need to be perfectly uniform at this stage. Small pieces of butter are acceptable, but there should not be large, hard chunks remaining.
Add the sugar, lemon zest, salt, and vanilla extract.
In a separate small bowl, lightly beat the egg yolks and whole egg together. Pour the beaten eggs into the flour mixture.
Use a fork or your fingertips to bring the ingredients together. At first, the mixture may appear dry and crumbly. Continue gently pressing it together until a cohesive dough begins to form.
If the mixture seems slightly dry, press it together with your hands before deciding whether additional liquid is necessary. Eggs vary in size, and excessive liquid can make the pastry sticky.
If the dough genuinely refuses to come together, add cold water a teaspoon at a time, using as little as possible.
Step 2: Bring the Dough Together Without Overworking It
Turn the mixture onto a clean work surface and gently press it together.
Avoid kneading it like bread dough. Shortcrust pastry benefits from minimal handling because excessive mixing can develop gluten, resulting in a tougher crust.
Press the dough into a thick, flat disc. A flat disc chills more evenly than a ball and is easier to roll out later.
Divide the dough into two portions, making one portion slightly larger than the other. The larger portion will form the bottom and sides of the tart, while the smaller portion will form the top.
Wrap both portions separately and refrigerate them for at least 60 minutes.
This resting period is important. It allows the butter to firm up and the flour to hydrate, making the dough easier to handle. Chilling also helps the pastry maintain its shape during baking.
If the dough is too firm to roll after refrigeration, leave it at room temperature for approximately 5–10 minutes before trying again.
Step 3: Prepare the Lemon and Vanilla Milk
While the pastry chills, begin preparing the custard.
Pour the milk into a heavy-based saucepan. Add the finely grated lemon zest.
Place the saucepan over medium heat and warm the milk gradually.
You want the milk to become hot and steamy, with small bubbles beginning to form around the edges. It should not boil vigorously.
Remove the saucepan from the heat and allow the lemon zest to infuse for approximately 5–10 minutes.
This short infusion helps release the aromatic oils from the lemon peel, giving the custard a natural citrus fragrance.
Add the vanilla extract. If you prefer a particularly smooth custard without visible pieces of zest, strain the milk through a fine-mesh sieve before using it. Alternatively, leave the zest in the milk for a stronger homemade flavor.
Set the warm milk aside while preparing the egg mixture.
Step 4: Whisk the Egg Yolks and Sugar
Place the egg yolks in a large heatproof mixing bowl.
Add the granulated sugar and whisk until the mixture becomes smooth and slightly lighter in color.
Add the cornstarch and a small pinch of salt.
Whisk thoroughly until no dry pockets or visible lumps of cornstarch remain.
The mixture will become thick. This is normal.
Take your time with this stage because the cornstarch needs to be evenly distributed before the warm milk is added. Undissolved lumps can be difficult to remove once the custard begins thickening.
If necessary, scrape around the sides and bottom of the bowl with a silicone spatula to ensure that all the ingredients are incorporated.
Step 5: Temper the Egg Mixture
Tempering means gradually adding warm liquid to an egg mixture so that the eggs warm gently instead of cooking suddenly.
This is an important step in making smooth pastry cream.
Slowly pour a small amount of the warm lemon milk into the egg yolk mixture while whisking continuously.
Begin with approximately 100–150 ml of milk. Continue whisking until the mixture is smooth.
Add another small amount of warm milk and whisk again.
Repeat this process until roughly half the milk has been incorporated. You can then pour in the remaining milk more steadily while continuing to whisk.
Avoid pouring all the hot milk into the eggs at once. Sudden high heat can cause the egg yolks to coagulate and form small cooked pieces.
Once everything has been combined, pour the mixture back into the saucepan.
If you notice a few small lumps before cooking, you can strain the mixture. However, thorough whisking at this stage should help keep the custard smooth.
Step 6: Cook the Pastry Cream
Place the saucepan over medium-low to medium heat.
Whisk continuously, paying particular attention to the bottom and corners of the saucepan, where the custard is most likely to catch.
At first, the mixture will remain fairly thin. As the milk warms and the cornstarch begins to thicken, the custard will gradually become more substantial.
Continue whisking as the temperature rises.
When the mixture begins to thicken, reduce the heat slightly if necessary. The custard may suddenly change from a liquid consistency to a thick cream, so remain beside the saucepan.
Once it has thickened, allow it to bubble gently for approximately 30–60 seconds while whisking continuously. This helps cook the starch properly and reduces the risk of a floury or starchy taste.
The finished custard should be thick enough to leave visible trails when you drag the whisk through it.
Remove the saucepan from the heat.
Add the optional butter and whisk until fully incorporated.
The butter is not essential, but it gives the custard a richer mouthfeel and a smooth finish.
Step 7: Cool the Custard Properly
Transfer the hot custard to a shallow heatproof bowl.
Spread it into an even layer so that it cools more quickly.
Place plastic wrap directly against the surface of the custard. This prevents a skin from forming as it cools.
Allow the custard to cool briefly, then refrigerate it until thoroughly chilled.
Depending on the depth of the bowl and the temperature of your refrigerator, this may take approximately 1–2 hours.
Do not assemble the tart while the custard is hot. Warm custard can soften the pastry, make the dough difficult to handle, and interfere with the final texture.
Once chilled, the custard will be quite firm. Before assembling the tart, whisk it gently until smooth and spreadable.
Do not whisk aggressively for too long, as excessive mixing can make the filling looser than desired.
Step 8: Prepare the Tart Pan
Remove the larger portion of chilled pastry from the refrigerator.
Lightly flour your work surface and rolling pin.
If the pastry is very hard, allow it to rest for a few minutes before rolling. It should be cold but flexible enough to roll without breaking into many pieces.
Roll the dough into a circle approximately 3–4 mm thick.
The circle should be large enough to cover the base and sides of your tart pan, with a little extra pastry around the edges.
Carefully transfer the dough to the pan. One convenient method is to gently roll the pastry around the rolling pin and then unroll it over the pan.
Press the pastry into the bottom and sides without stretching it.
Stretching the dough can cause it to shrink during baking, so allow it to settle naturally into the shape of the pan.
Gently press the pastry into the corners and along the sides.
If small cracks appear, patch them with spare pieces of dough and press the edges together.
Trim any excessive overhang, leaving enough pastry to create a neat edge.
Place the prepared pastry shell in the refrigerator while you prepare the top layer.
Step 9: Roll Out the Top Pastry
Take the smaller portion of dough from the refrigerator.
Place it on a lightly floured surface and roll it into a circle slightly larger than the top of the tart pan.
Try to maintain an even thickness of approximately 3–4 mm.
The top pastry should be large enough to cover the custard completely and meet the pastry around the edges.
If the dough becomes too soft while rolling, place it on a flat tray and refrigerate it for 10–15 minutes.
If it cracks slightly, press the cracks together gently. Shortcrust pastry is forgiving, and small imperfections can usually be repaired without affecting the final appearance.
Keep the rolled pastry on a sheet of baking parchment until you are ready to assemble the tart.
Step 10: Fill the Pastry Shell With Custard
Remove the prepared pastry shell from the refrigerator.
Give the chilled custard a gentle whisk until it becomes smooth and creamy.
Spoon the custard into the pastry shell.
Spread it evenly with a spatula, making sure it reaches the edges without leaving large air pockets.
Smooth the surface so that the custard forms an even layer.
Leave a small amount of space near the upper edge of the pastry. The filling should not be piled excessively high because it can make sealing the top difficult.
The filling should be thick enough to support the upper pastry without running over the sides.
If your custard appears unusually loose, refrigerate it longer before continuing.
Step 11: Add the Upper Pastry Layer
Carefully lift the rolled top pastry and position it over the custard.
If the pastry is on baking parchment, you can use the parchment to help guide it into place.
Gently lower the dough over the filling, allowing it to rest naturally on the surface.
Press the top pastry around the edges so that it joins the lower pastry.
Trim away excessive dough and press the edges together firmly enough to seal them.
You can use your fingertips or the back of a fork to create a simple decorative border.
Make sure the seam is closed all the way around. If gaps remain, custard may escape during baking.
If the upper pastry tears, patch it with a small piece of spare dough and press the edges together gently.
The top does not need to be perfectly smooth. A few natural variations are characteristic of homemade pastry, and the pine nuts will cover much of the surface.
Step 12: Add the Pine Nuts
Scatter the pine nuts evenly over the top pastry.
Press them very gently into the dough so that they remain in place during baking.
Distribute the nuts across the surface rather than concentrating them in one area.
The pine nuts will become lightly toasted in the oven, developing a warm, nutty flavor.
Avoid pressing them deeply into the dough because they should remain visible on the finished tart.
If you like a more decorative appearance, arrange the nuts in a loose circular pattern, beginning near the center and working toward the edge.
You do not need to create a perfectly symmetrical design. A generous, even scattering is sufficient for a traditional homemade presentation.
Step 13: Chill the Assembled Tart
Before baking, place the assembled tart in the refrigerator for approximately 15–20 minutes.
This additional chilling period helps the butter in the pastry firm up again after rolling and assembly.
Cold pastry is less likely to shrink excessively in the oven and is generally easier to bake into a neat shape.
Meanwhile, preheat your oven to 175°C (350°F) using conventional top-and-bottom heat.
If you use a fan-assisted oven, approximately 160°C (320°F) is a reasonable starting point, although individual ovens vary.
Position the oven rack in the middle of the oven so that the tart receives even heat.
Allow the oven to reach the correct temperature before placing the tart inside.
Step 14: Bake the Torta della Nonna
Place the chilled tart pan on a baking tray. This makes it easier to handle and helps catch any small amount of butter that might escape.
Transfer the tray to the middle rack of the preheated oven.
Bake for approximately 45–55 minutes.
The exact baking time depends on the thickness of the pastry, the material of the pan, and the characteristics of your oven.
During the first 25–30 minutes, the pastry will begin to set and the top will gradually turn pale golden.
As baking continues, the pine nuts will toast and the upper pastry will become more deeply golden.
Avoid opening the oven repeatedly during the first half of baking because frequent temperature changes can affect how evenly the pastry cooks.
Begin checking the tart after approximately 40 minutes.
The tart is ready when the upper pastry is golden, the edges look set, and the pine nuts are lightly toasted.
If the top begins browning too quickly before the pastry has finished baking, loosely cover it with a piece of aluminum foil.
Do not press the foil against the pine nuts or pastry. Simply place it over the tart to reduce further browning.
Continue baking until the pastry is cooked through.
Because the filling was already cooked before assembly, the main purpose of baking is to cook the pastry and bring the filling and crust together.
Step 15: Cool the Tart Without Damaging It
Remove the tart from the oven and place the pan on a cooling rack.
Allow it to rest in the pan for at least 45–60 minutes before attempting to remove it.
The pastry will be delicate while hot, and the custard will still be soft. Moving the tart too soon can cause the crust to crack or the filling to shift.
After the initial cooling period, carefully remove the outer ring if you are using a removable-base pan.
Allow the tart to cool completely.
For the neatest slices and the best custard texture, refrigerate the tart for another 2–3 hours after it has cooled sufficiently.
The custard will become more stable as it chills, making it easier to cut clean slices.
Although you may be tempted to serve it immediately, giving the tart enough time to cool is one of the most important steps in the entire recipe.
Step 16: Finish With Powdered Sugar
Once the tart is completely cool, place it on a serving plate.
Using a small sieve, dust the surface with powdered sugar.
A light, even coating is usually sufficient. The pine nuts should remain visible beneath the sugar.
If desired, add a very small amount of fresh lemon zest just before serving.
Avoid adding too much lemon zest at this stage because the custard already contains lemon flavor, and excessive zest can overpower the delicate pine nuts.
For a traditional appearance, keep the decoration simple. The golden pastry, toasted nuts, and snowy powdered sugar provide all the visual contrast this dessert needs.
Step 17: Slice and Serve
Use a sharp knife to cut the tart into wedges.
For cleaner slices, wipe the knife with a warm, slightly damp cloth between cuts.
The pastry should be tender enough to cut without excessive pressure, while the custard should hold its shape.
Serve each slice on its own or alongside a small amount of softly whipped cream.
Torta della Nonna is delicious at cool room temperature, but it can also be served slightly chilled.
Allow refrigerated slices to stand for approximately 10–15 minutes before serving if you prefer the custard to have a softer texture.
A cup of espresso, cappuccino, or tea makes an excellent accompaniment.
The mild bitterness of coffee balances the sweetness of the pastry and custard, while tea offers a lighter pairing.
The Secret to Perfect Torta della Nonna
The best results come from paying attention to a few details that may seem small but make a substantial difference to the finished dessert.
Keep the pastry cool. Warm butter makes shortcrust pastry difficult to handle and can cause it to become greasy. Chill the dough whenever it becomes too soft.
Avoid overworking the dough. Mix only until the ingredients come together. Excessive kneading can make the finished crust tough.
Cook the custard thoroughly. The cornstarch needs enough heat to thicken the filling properly. Once the custard has thickened, allow it to bubble gently for a short time while whisking.
Cool the filling completely. Hot custard can soften the pastry and make the tart difficult to assemble.
Seal the edges carefully. The upper and lower pastry layers should meet securely around the entire tart.
Bake until the pastry is golden. Pale pastry may still taste undercooked, even if the custard has already been prepared.
Allow enough cooling time. A properly cooled tart slices more neatly and has a better overall texture.
How to Make the Custard Extra Smooth
A smooth custard is one of the defining features of Torta della Nonna.
Start by whisking the egg yolks, sugar, and cornstarch thoroughly before adding the milk. The mixture should be free of visible starch lumps.
Temper the eggs gradually with warm milk rather than exposing them to intense heat immediately.
Once the mixture is on the stove, whisk continuously. Do not leave the saucepan unattended while the custard thickens.
If small lumps develop, remove the saucepan from the heat and whisk vigorously. If necessary, pass the cooked custard through a fine-mesh sieve while it is still warm.
If the custard is too thin, it may not have cooked long enough for the starch to thicken fully. Return it to gentle heat and continue whisking until it reaches the proper consistency.
If it is too thick after chilling, whisk it gently until it becomes spreadable.
Avoid adding extra milk casually because too much liquid can make the filling runny and reduce the stability of the finished tart.
How to Make the Pastry Tender and Buttery
Italian sweet shortcrust pastry should be delicate, rich, and easy to cut.
The most important factor is the balance between the flour, butter, sugar, and eggs.
Use cold butter and avoid melting it before mixing. Melted butter changes the structure of the dough and may produce a different texture.
Measure the flour accurately. Too much flour can make the pastry dry and crumbly, while too little can make it difficult to handle.
Do not add excessive water. The eggs should provide most of the moisture needed to bind the dough.
If the pastry breaks during rolling, do not immediately add more liquid. Press the dough together gently and allow it to rest for a few minutes.
If the dough becomes sticky, refrigerate it rather than adding large amounts of flour.
These small adjustments help preserve the tender texture that makes homemade Torta della Nonna so enjoyable.
Common Mistakes and How to Avoid Them
Mistake 1: The pastry is too hard
A tough pastry usually results from overworking the dough or adding too much flour.
Mix the ingredients only until they form a dough. Roll it gently and avoid repeatedly gathering and rerolling the scraps.
Mistake 2: The pastry cracks while rolling
Cold dough can crack if it is too firm.
Allow it to rest at room temperature for a few minutes before rolling. If a crack develops, press the edges together with your fingertips.
Mistake 3: The custard contains lumps
Lumps can form if the cornstarch is not mixed properly or the eggs become too hot too quickly.
Whisk the yolks, sugar, and cornstarch until smooth. Add warm milk gradually and stir continuously while cooking.
Mistake 4: The custard runs out of the tart
This usually happens when the custard is too thin, the pastry edges are poorly sealed, or the filling has been added while warm.
Make sure the custard is thoroughly chilled and thick before assembling the tart. Seal the pastry edges carefully.
Mistake 5: The bottom pastry remains pale
The base may be undercooked if the oven temperature is too low, the pan is too thick, or the tart has not baked long enough.
Use the middle rack and allow sufficient baking time. If your oven heats unevenly, check whether the pan is positioned correctly.
Mistake 6: The pine nuts become too dark
Pine nuts contain natural oils and can brown relatively quickly.
Check the tart during the final stages of baking. If the nuts become too dark before the pastry is ready, loosely cover the surface with foil.
Mistake 7: The tart falls apart when sliced
Warm custard and freshly baked pastry are both delicate.
Allow the tart to cool completely and chill it before slicing. Use a sharp knife and clean it between cuts.
Mistake 8: The filling tastes starchy
Cornstarch needs to be cooked properly to avoid an unpleasant raw-starch flavor.
Once the custard thickens, allow it to bubble gently for approximately 30–60 seconds while whisking continuously.
Mistake 9: The pastry shrinks in the oven
Shrinking can happen when the dough is stretched during assembly or has not rested sufficiently.
Fit the pastry into the pan without pulling it. Chill the assembled tart before baking.
Helpful Ingredient Substitutions
Traditional Torta della Nonna is best made with butter, egg yolks, whole milk, and pine nuts, but certain substitutions are possible.
Butter
Unsalted butter provides the most traditional flavor. If using salted butter, reduce or omit the additional salt in the pastry.
Margarine can be used in some recipes, but the flavor and texture will differ. Products with a high water content may affect how the dough handles.
Flour
All-purpose flour works well for this recipe.
Pastry flour can also be used, although the dough may require slightly different handling because of its lower protein content.
Whole-wheat flour is not an ideal direct replacement for all the flour because it produces a denser, more pronounced flavor. If you experiment with it, replace only a portion of the all-purpose flour and expect a different texture.
Milk
Whole milk is recommended for the richest custard.
Lower-fat dairy milk can work, although the custard may be less creamy.
Plant-based milks can be used experimentally, but their flavor, protein content, and thickening behavior vary. An unsweetened variety is preferable because the recipe already contains sugar.
Cornstarch
Cornstarch produces a smooth, relatively stable custard.
Other starches may behave differently, so substitutions should not automatically be made in equal amounts. If using another thickener, follow a tested pastry-cream formula designed for that ingredient.
Pine Nuts
Pine nuts are traditional, but chopped almonds can provide a pleasant alternative if pine nuts are unavailable or unsuitable for your budget.
The taste will be different, and the result will not be quite as traditional. Toasted almond flakes are another option, although they can brown more quickly than pine nuts.
Lemon
Fresh lemon zest provides the best fragrance.
If you do not enjoy lemon, reduce the amount and emphasize the vanilla instead. Avoid adding lemon juice directly to the milk because its acidity may cause the milk to curdle.
Delicious Variations of Torta della Nonna
Although the classic version is wonderful on its own, there are several ways to adapt the recipe while retaining its Italian-inspired character.
Vanilla Torta della Nonna
For a more pronounced vanilla flavor, increase the vanilla extract slightly or use the seeds from a vanilla pod.
Reduce the lemon zest if you prefer the vanilla to be the main flavor.
This variation is particularly suitable for people who enjoy a mild, creamy custard without a strong citrus fragrance.
Extra-Lemony Torta della Nonna
For a brighter flavor, infuse the milk with a little additional lemon zest.
Use only the yellow peel and avoid adding too much, as an excessive amount can introduce bitterness.
A restrained amount of lemon gives the custard freshness without overwhelming the buttery pastry.
Almond Torta della Nonna
Replace the pine nuts with sliced almonds.
Scatter them evenly over the top and monitor the tart during baking because thin almond slices can brown quickly.
The result has a slightly more pronounced nutty flavor and a delicate crunch.
Chocolate-Infused Variation
For a chocolate-inspired version, you can add a small amount of finely chopped dark chocolate to the warm custard after removing it from the heat.
Stir until completely melted and smooth.
This creates a variation rather than a traditional Torta della Nonna, and the chocolate will change the balance of flavors.
Keep the quantity moderate so that the custard remains the main feature.
Orange-Scented Variation
Replace some or all of the lemon zest with finely grated orange zest.
Orange gives the custard a sweeter, softer citrus fragrance that pairs beautifully with butter and toasted nuts.
Use fresh zest rather than orange juice to preserve the custard’s consistency.
Individual Torta della Nonna Tarts
You can prepare this recipe in individual tartlet pans.
Divide the pastry between the pans, add the chilled custard, cover with smaller pastry circles, and finish with pine nuts.
Because individual tarts are smaller, they may bake more quickly than a large tart. Begin checking them early and remove them when the pastry is golden and fully cooked.
Individual portions are attractive for celebrations and make serving easier.
What to Serve With Torta della Nonna
Torta della Nonna is rich enough to serve by itself, but simple accompaniments can make the dessert feel especially complete.
Freshly brewed espresso is a classic choice. Its strong flavor balances the sweetness of the pastry and custard.
Cappuccino works beautifully for an afternoon treat, while black tea provides a gentler pairing.
Fresh berries can add color and a slightly tart contrast. Strawberries, raspberries, or blueberries are all suitable, although they are not necessary for a traditional presentation.
A small spoonful of lightly whipped cream can be served alongside each slice, but avoid adding too much because the custard already provides a creamy texture.
For a dinner party, serve moderate slices on plain plates with a light dusting of powdered sugar. The dessert is visually attractive without elaborate decoration.
How to Store Torta della Nonna
Because the filling contains milk and eggs, Torta della Nonna should be refrigerated after cooling.
Place the tart in an airtight container or cover it securely and refrigerate it at 4°C (40°F) or below.
For best quality, enjoy it within approximately 3 days.
The pastry will gradually soften as it absorbs moisture from the custard, but the flavor remains enjoyable.
If you prefer the pastry at its crispest, serve the tart relatively soon after it has fully cooled and set.
Do not leave the finished custard tart at room temperature for more than 2 hours, or more than 1 hour in very hot conditions above 32°C (90°F).
For serving, remove only the portions you need and return the remainder to the refrigerator promptly.
Can You Make Torta della Nonna Ahead of Time?
Yes. In fact, preparing the dessert ahead of time can make the process much more convenient.
You can prepare the pastry dough a day in advance and keep it wrapped in the refrigerator.
The custard can also be prepared a day ahead. Store it in a covered container with food wrap pressed directly against its surface.
When you are ready to assemble the tart, whisk the chilled custard gently until smooth.
You can also bake the entire tart a day before serving. Let it cool completely, refrigerate it, and dust it with powdered sugar shortly before presentation.
Making the tart ahead of time gives the filling plenty of time to become firm, which often makes slicing easier.
Can You Freeze Torta della Nonna?
Freezing is possible, but the texture may change.
Custard can sometimes become slightly grainy or release moisture after thawing, while the pastry may lose some of its original delicacy.
For the best quality, it is generally preferable to freeze the unbaked pastry dough rather than the assembled custard tart.
Wrap the pastry dough securely and freeze it for up to approximately 2 months for best quality. Thaw it overnight in the refrigerator before rolling.
If you decide to freeze the baked tart, allow it to cool completely first. Wrap it carefully and store it in a freezer-safe container.
Thaw it in the refrigerator rather than leaving it on the counter.
The finished texture may not be identical to a freshly baked tart, so refrigeration is the preferred storage method when you plan to serve it within a few days.
Frequently Asked Questions
Is Torta della Nonna a cake or a pie?
Although its Italian name includes the word torta, it is closer to a filled tart or pie than a traditional sponge cake.
It consists of shortcrust pastry surrounding a creamy custard filling, with pine nuts on top.
What does Torta della Nonna taste like?
It tastes buttery, creamy, gently sweet, and lightly citrusy.
The pastry provides a delicate crumbly texture, the custard contributes richness, and the pine nuts add a subtle toasted flavor.
The lemon and vanilla give the dessert fragrance without making it taste strongly of either ingredient.
Is the custard supposed to be firm?
Yes. The filling should be thick enough to hold its shape when sliced after the tart has cooled.
It should not be watery or runny, but it should still have a smooth, creamy texture.
Why does the recipe use egg yolks instead of only whole eggs?
Egg yolks provide richness, color, and a smooth texture.
They also help create the characteristic flavor of Italian pastry cream. The additional yolks in this recipe make the filling particularly rich and suitable for a traditional-style custard tart.
Can I use ready-made pastry?
Yes, ready-made sweet shortcrust pastry can be used if you want to save time.
Choose a pastry suitable for both the base and the top of a filled tart. Follow the package instructions for handling and baking, while still making the custard from scratch for the most traditional flavor.
The finished dessert may differ slightly from one made with homemade pasta frolla.
Can I use store-bought custard?
You can, but ordinary pourable custard may be too thin to support the top pastry layer.
The filling needs to be thick enough to remain in place during assembly and slicing. A suitable thick pastry cream is preferable to a thin pouring custard.
Should I blind-bake the bottom crust?
This recipe does not require blind-baking because the pastry shell is covered with custard and a second layer of pastry before the entire tart is baked.
Blind-baking is more common for certain open tarts with fillings added after the crust has cooked.
How do I know when the tart is ready?
Look for a golden upper crust, lightly toasted pine nuts, and pastry edges that appear fully cooked.
The custard is prepared in advance, so the baking process mainly finishes the pastry and warms the assembled dessert.
Can I make it without pine nuts?
Yes. Pine nuts are traditional, but you can leave them out or substitute sliced almonds if necessary.
Without nuts, the dessert will still have the buttery pastry and creamy custard that define Torta della Nonna.
Is Torta della Nonna served warm or cold?
It is generally served cooled, often slightly chilled or at cool room temperature.
Allowing the tart to cool gives the custard time to set and makes the slices easier to serve neatly.
Why is lemon zest used instead of lemon juice?
Lemon zest contains aromatic oils that provide a fragrant citrus flavor.
Lemon juice adds acidity and liquid, which can interfere with the milk and alter the custard’s texture. Zest is therefore the more suitable choice for this recipe.
How can I cut perfectly neat slices?
Cool the tart completely, refrigerate it until the filling is firm, and use a sharp knife.
Wipe the blade between cuts to prevent custard from dragging across the pastry.
Can I prepare the recipe without a removable-base pan?
Yes. A regular tart pan can work, provided it is sturdy and suitable for baking.
Allow the tart to cool thoroughly before cutting it in the pan. If you want to remove the whole tart, line the pan carefully with parchment where possible and handle it gently.
Final Tips for the Best Homemade Torta della Nonna
For the most successful result, pay attention to the pastry, custard, and cooling stages rather than trying to rush the recipe.
Use cold butter for the pastry and handle the dough gently. Cook the custard until it is thick and smooth, then cool it completely before filling the tart. Seal the pastry carefully, distribute the pine nuts evenly, and bake until the crust becomes golden.
Most importantly, give the finished tart enough time to cool and set before slicing.
Torta della Nonna is a wonderful example of how simple ingredients can create an elegant dessert. Flour, butter, eggs, milk, sugar, lemon, vanilla, and pine nuts come together to produce something that feels both rustic and special.
The finished tart has a crisp, buttery exterior, a smooth custard center, and a delicate nutty topping. Each slice offers a satisfying balance of sweetness, richness, and fragrance.
Serve it after a family meal, enjoy a slice with afternoon coffee, or prepare it for a gathering where a traditional homemade dessert deserves to be the centerpiece.
Once you have mastered this recipe, you will have learned two essential Italian baking techniques: making tender pasta frolla and preparing silky crema pasticcera. Together, they create the unmistakable charm of Torta della Nonna, a timeless Italian dessert that celebrates the pleasure of simple, carefully prepared homemade food.


