admin1
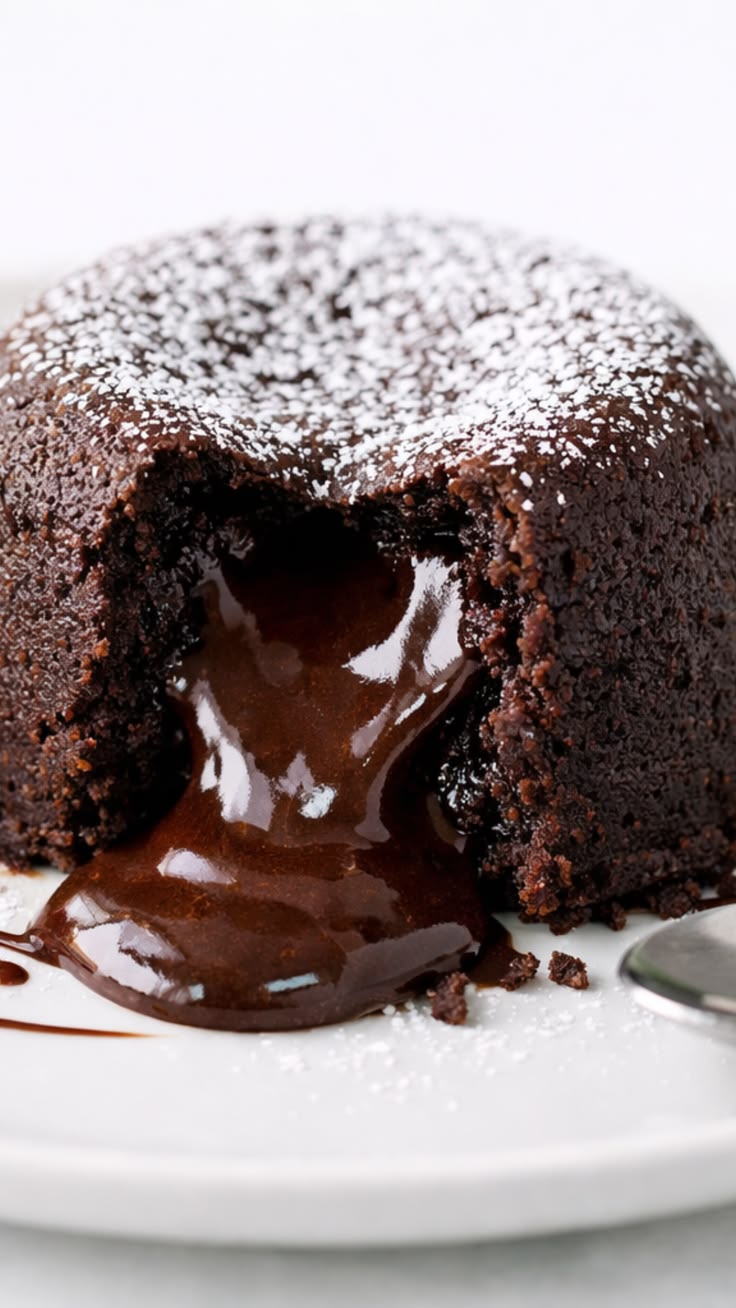
Chocolate lava cake is one of those desserts that always feels special, yet it is surprisingly simple to prepare at home. Instead of using a conventional oven, this version is made entirely in the air fryer, making it a convenient choice for anyone who wants an impressive dessert without spending a lot of time in the kitchen. The outside develops a delicate cake-like texture while the inside stays wonderfully soft and filled with warm melted chocolate.
One of the biggest advantages of making lava cakes in the air fryer is how quickly they cook. There is no need to heat a large oven, and the cooking time is much shorter than many traditional desserts. With just a few pantry ingredients and four ramekins, it is possible to prepare a restaurant-style dessert in less than half an hour.
The secret to a successful lava cake is balancing the baking time. The edges should be fully cooked so the cake can hold its shape when turned out onto a plate, while the center remains silky and molten. Covering the ramekins with foil during the first stage of cooking helps the batter cook more evenly. This extra step prevents the tops from setting too quickly while allowing the sides to become firm enough to support the soft chocolate center.
Whether served after a family dinner, prepared for a weekend gathering, or enjoyed as a homemade treat, these chocolate lava cakes deliver rich chocolate flavor in every bite. They pair beautifully with powdered sugar, fresh berries, whipped cream, vanilla ice cream, or simply enjoyed on their own while still warm.
Why This Recipe Works
This recipe uses a simple combination of chocolate, butter, eggs, sugar, and flour to create a dessert with two completely different textures. The outside bakes into a light sponge while the inside stays creamy and rich. Since only a small amount of flour is added, the batter remains soft enough to create the signature molten center.
Preparing the ramekins properly is another important part of the recipe. A light coating of butter followed by cocoa powder creates a protective layer that helps the cakes release easily after cooking. Instead of sticking to the dish, the cakes slide out neatly while keeping their shape.
Cooking with foil during the first few minutes also makes a noticeable difference. The foil slows the heat reaching the top of the batter while the sides cook first. After removing the foil, the tops puff gently without becoming dry or cracked.
The result is a dessert with a smooth chocolate flavor, a tender outer cake, and a warm liquid center that flows naturally when cut open.
What Makes These Lava Cakes Special?
Unlike many baked desserts that require multiple bowls, mixers, or complicated techniques, this recipe is straightforward from start to finish. Everything comes together in one mixing bowl after the chocolate and butter have melted.
The air fryer also creates a consistent cooking environment, helping achieve reliable results with very little effort. Since the cooking time is relatively short, it is easy to prepare these cakes shortly before serving.
Another advantage is portion control. Each ramekin contains an individual serving, making presentation easy and eliminating the need to slice or portion a larger dessert.
Ingredients Overview
Although this dessert looks elegant, it relies on only a handful of basic ingredients. Each one contributes to the final texture and flavor.
Semi-Sweet Chocolate
Chocolate is the heart of this recipe. Since it makes up most of the flavor, choosing a good-quality semi-sweet chocolate creates a smoother batter and richer taste. When melted together with butter, it forms the luxurious base of the cake.
Butter
Butter gives richness and creates the smooth consistency that lava cakes are known for. As it melts into the chocolate, it creates a glossy mixture that blends easily with the remaining ingredients.
Either salted or unsalted butter works well. If salted butter is used, only a very small pinch of additional salt is needed.
Eggs and Egg Yolk
Whole eggs provide the structure needed for the cakes to rise and hold together. The additional egg yolk contributes extra richness, helping create the soft molten center that makes lava cakes unique.
Whisking the eggs thoroughly into the chocolate mixture ensures the batter becomes smooth and evenly combined.
Powdered Sugar
Powdered sugar dissolves quickly into the warm chocolate mixture without leaving any grainy texture. It sweetens the batter while keeping the finished cakes delicate and soft.
Unlike granulated sugar, powdered sugar blends almost instantly, making the batter silky and smooth.
Vanilla
A small amount of vanilla enhances the chocolate without overpowering it. Even though only one teaspoon is used, it adds warmth and depth to the overall flavor.
Vanilla paste or vanilla extract can both be used with equally good results.
Salt
A pinch of salt balances the sweetness and brings out the richness of the chocolate. Even a small quantity makes the finished dessert taste more rounded. b
All-Purpose Flour
Only a little flour is needed. It provides just enough structure for the cakes to hold together while allowing the centers to remain soft and molten.
Adding too much flour would make the cakes resemble regular chocolate cupcakes instead of lava cakes, so measuring accurately is important.
Butter and Cocoa Powder for the Ramekins
Preparing the ramekins properly is essential.
The butter creates a non-stick surface while the cocoa powder forms a light coating that prevents sticking without leaving white flour marks on the finished cakes.
After coating the ramekins, gently tap out any excess cocoa powder before adding the batter.
Equipment Needed
No special baking equipment is required for this recipe. A few common kitchen tools are all that is needed.
- Air fryer
- Four 6-ounce ramekins
- Large microwave-safe bowl or double boiler
- Whisk
- Measuring cups or kitchen scale
- Rubber spatula
- Butter knife
- Aluminum foil
- Serving plates
Using ramekins of the same size helps ensure that all four cakes cook evenly.
Preparing the Ramekins
This simple preparation step helps produce professional-looking lava cakes.
Start by lightly coating the inside of each ramekin with butter. Once coated, add about one-quarter teaspoon of cocoa powder to each dish. Rotate each ramekin until every side is covered, then tap out the excess.
This thin layer creates a barrier between the batter and the ramekin so the cakes release easily after cooking.
Skipping this step may cause the cakes to stick, making them difficult to remove without breaking.
Melting the Chocolate
The chocolate and butter should melt together slowly.
Place both ingredients in a microwave-safe bowl and heat in 30-second intervals, stirring after each interval until completely smooth.
Alternatively, place the bowl over a saucepan of gently simmering water to melt everything gradually.
The finished mixture should appear glossy, smooth, and free from lumps.
Allow it to cool slightly before adding the eggs. This prevents the eggs from beginning to cook when mixed into the warm chocolate.
Mixing the Batter
Once the melted chocolate and butter mixture has cooled slightly, it is ready for the remaining ingredients. Add the eggs, extra egg yolk, vanilla, salt, and powdered sugar directly into the bowl. Whisk everything together until the mixture becomes smooth, glossy, and fully combined. There should be no streaks of egg or dry sugar remaining.
The final ingredient is the all-purpose flour. Sprinkle it evenly over the batter and whisk gently until it is fully incorporated. Since only a small amount of flour is used, avoid overmixing. Stir only until the batter looks smooth and uniform.
At this stage, the batter should have a thick yet pourable consistency with a rich chocolate color. It should flow easily into the prepared ramekins without being too runny.
Filling the Ramekins
Divide the batter evenly among the four prepared ramekins. Filling each ramekin with a similar amount of batter helps ensure they cook at the same rate.
Leave a small amount of space at the top of each ramekin to allow the cakes to rise slightly during cooking. Smooth the tops gently with the back of a spoon or spatula if necessary.
Once filled, cover each ramekin tightly with a piece of aluminum foil. Make sure the foil extends over the edges and is tucked securely underneath the ramekin. This prevents it from moving inside the air fryer while cooking.
Although this may seem like a small detail, securing the foil properly helps maintain even cooking and avoids interference with the air fryer fan.
Cooking in the Air Fryer
Place the covered ramekins into the air fryer basket, leaving a little space between each one if possible. This allows the hot air to circulate evenly around the desserts.
Cook the cakes at 350°F (180°C) for about 8 minutes with the foil in place.
After this initial cooking time, carefully remove the foil from each ramekin. Return the cakes to the air fryer and continue cooking for another 3 to 4 minutes.
The cakes are ready when the edges appear firm and the tops are lightly puffed, while the centers still have a slight softness when gently touched.
Every air fryer heats a little differently, so the exact cooking time may vary slightly. It is always better to check the cakes during the final minutes rather than overcook them. Even one or two extra minutes can cause the molten center to become fully baked.
Let the Cakes Rest
Once the ramekins are removed from the air fryer, allow them to rest for about 2 minutes before unmolding.
This short resting time gives the edges an opportunity to firm up while the center remains wonderfully soft and molten.
Avoid leaving them in the ramekins for too long, as the residual heat may continue cooking the centers.
Removing the Cakes
To remove the cakes successfully, run a butter knife gently around the inside edge of each ramekin.
Place a serving plate upside down over the ramekin and carefully invert it while holding both the plate and ramekin securely. Wearing oven mitts is recommended because the ramekins will still be hot.
Give the ramekin a gentle tap if needed. The cake should slide out cleanly, revealing its smooth chocolate exterior.
If the ramekins were properly greased and dusted with cocoa powder, the cakes should release easily without sticking.
Serving Suggestions
Chocolate lava cakes are best enjoyed immediately after they are removed from the ramekins. The warm center stays molten only for a short time, making fresh serving the ideal choice.
A light dusting of powdered sugar creates a simple and elegant finish while allowing the rich chocolate flavor to remain the highlight.
For a more complete dessert, try serving the cakes with one or more of the following:
- Vanilla ice cream
- Fresh strawberries
- Fresh raspberries
- Fresh blueberries
- Whipped cream
- Chocolate shavings
- Cocoa powder
- Chocolate curls
- Fresh mint leaves
- A drizzle of chocolate sauce
- Caramel sauce
- Chopped toasted nuts
The contrast between the warm cake and a cold scoop of vanilla ice cream is especially delicious.
Tips for the Best Chocolate Lava Cakes
A few simple techniques can make a noticeable difference in the final result.
Use Good Quality Chocolate
Since chocolate is the main flavor in this dessert, choose a semi-sweet chocolate that melts smoothly and has a rich taste.
Measure Ingredients Carefully
Accurate measurements help maintain the correct balance between the soft center and the baked edges.
Do Not Overmix
Mix only until the flour disappears into the batter. Overmixing can affect the final texture.
Watch the Cooking Time
The difference between a molten center and a fully baked cake is often just a minute or two. Begin checking the cakes during the final cooking stage.
Prepare the Ramekins Well
Greasing with butter and coating with cocoa powder helps the cakes release easily and gives them a clean appearance.
Let the Chocolate Cool Slightly
Adding eggs to very hot chocolate may cause them to cook prematurely. Let the mixture cool for a few minutes before whisking in the eggs.
Common Mistakes to Avoid
Even a simple dessert can have a few challenges. Keeping these points in mind will help produce reliable results.
- Using very hot melted chocolate when adding the eggs.
- Forgetting to grease and dust the ramekins.
- Overcooking the cakes until the centers become fully baked.
- Using too much flour.
- Filling the ramekins unevenly.
- Removing the cakes immediately without allowing a short resting time.
- Leaving the foil loose during the first stage of cooking.
Avoiding these mistakes helps create cakes with soft centers and delicate edges every time.
Make-Ahead Instructions
This dessert can be prepared ahead of time, making it a convenient option for entertaining.
Prepare the batter and divide it among the greased ramekins. Cover each ramekin tightly and refrigerate for up to 2 days.
Before cooking, remove the ramekins from the refrigerator and allow them to sit at room temperature for 20 minutes.
Once they have warmed slightly, cook them in the air fryer using the same cooking method.
This make-ahead option allows dessert to be served fresh with very little last-minute preparation.
Storage Information
Chocolate lava cakes are intended to be enjoyed fresh for the best molten center.
If leftovers remain, allow them to cool completely before covering the ramekins or transferring the cakes to an airtight container. Store them in the refrigerator for up to 2 days.
When reheated, the center may become more cake-like instead of flowing, but the flavor will remain rich and delicious.
Variations
Although this recipe is excellent as written, it can be served in different ways while keeping the original batter unchanged.
Some popular serving ideas include:
- Dust with powdered sugar.
- Add fresh mixed berries.
- Serve with vanilla ice cream.
- Garnish with whipped cream.
- Finish with chocolate curls.
- Sprinkle chopped nuts over the top.
- Add a drizzle of caramel sauce.
- Decorate with fresh mint leaves for color.
Description
These Air Fryer Chocolate Lava Cakes have a delicate chocolate cake on the outside and a warm, gooey molten chocolate center inside. Made with simple pantry ingredients, they cook quickly in the air fryer and make an elegant dessert for family dinners, holidays, or special occasions. Serving them warm with powdered sugar or your favorite toppings creates a rich and satisfying finish.
Recipe Details
| Category | Details |
|---|---|
| Course | Dessert |
| Cuisine | American, New Zealand |
| Difficulty | Easy |
| Servings | 4 |
| Prep Time | 5 minutes |
| Cook Time | 15 minutes |
| Total Time | 20 minutes |
| Calories | 361 kcal per serving |
Ingredients
- 140 g semi-sweet chocolate
- 100 g butter
- 2 large eggs
- 1 large egg yolk
- 60 g powdered sugar
- 1 teaspoon vanilla paste or vanilla extract
- Pinch of salt
- 32 g all-purpose flour
- Butter and cocoa powder for greasing the ramekins
Instructions
Step 1: Prepare the Ramekins
Lightly grease four 6-ounce ramekins with butter. Add about ¼ teaspoon of cocoa powder to each ramekin and rotate to coat the inside evenly. Tap out any excess cocoa powder.
Step 2: Melt the Chocolate
Place the semi-sweet chocolate and butter in a microwave-safe bowl. Heat in 30-second intervals, stirring after each interval until completely melted and smooth. Alternatively, melt them together using a double boiler over gently simmering water.
Step 3: Make the Batter
Allow the melted chocolate mixture to cool slightly. Whisk in the eggs, egg yolk, powdered sugar, vanilla, and a pinch of salt until smooth. Add the flour and whisk gently until no dry flour remains and the batter is fully combined.
Step 4: Fill the Ramekins
Divide the batter evenly among the prepared ramekins. Cover each ramekin tightly with aluminum foil, making sure the foil is tucked securely underneath to prevent it from moving during cooking.
Step 5: Air Fry
Arrange the ramekins in the air fryer basket.
Cook at 350°F (180°C) for 8 minutes with the foil on.
Carefully remove the foil and continue cooking for 3–4 minutes, or until the edges are set and the tops are lightly puffed while the centers remain soft.
Step 6: Rest and Unmold
Remove the ramekins from the air fryer and let them rest for 2 minutes.
Run a butter knife around the edge of each cake. Place a serving plate over each ramekin, carefully invert it, and gently tap if needed to release the cake.
Step 7: Serve
Serve immediately while warm with a light dusting of powdered sugar or your favorite toppings.
Notes
- Use good-quality semi-sweet chocolate for the richest flavor.
- Greasing the ramekins with butter and coating them with cocoa powder helps the cakes release easily.
- Allow the melted chocolate mixture to cool slightly before adding the eggs.
- Secure the foil tightly around the ramekins during the first stage of cooking so it stays in place inside the air fryer.
- Cooking times may vary slightly depending on your air fryer, so check the cakes during the final few minutes.
- The cakes are ready when the edges are firm but the centers still feel slightly soft.
- For the best molten center, serve immediately after removing the cakes from the ramekins.
- The batter can be prepared up to 2 days in advance. Cover the filled ramekins tightly and refrigerate. Let them sit at room temperature for 20 minutes before air frying.
Serving Suggestions
- Dust with powdered sugar.
- Serve with vanilla ice cream.
- Add whipped cream.
- Garnish with fresh strawberries, raspberries, or blueberries.
- Top with chocolate shavings or curls.
- Drizzle with chocolate or caramel sauce.
- Finish with fresh mint leaves for a simple presentation.
Storage
Store any leftover cakes in an airtight container in the refrigerator for up to 2 days. Reheat gently before serving. The centers may become less molten after reheating but will still have a rich chocolate flavor.
Nutrition (Per Serving)
| Nutrient | Amount |
|---|---|
| Calories | 361 kcal |
| Carbohydrates | 41 g |
| Protein | 9 g |
| Fat | 18 g |
| Saturated Fat | 9 g |
| Polyunsaturated Fat | 1 g |
| Monounsaturated Fat | 6 g |
| Trans Fat | 0.04 g |
| Cholesterol | 145 mg |
| Sodium | 87 mg |
| Potassium | 297 mg |
| Fiber | 3 g |
| Sugar | 29 g |
| Vitamin A | 267 IU |
| Calcium | 77 mg |
| Iron | 3 mg |