admin1
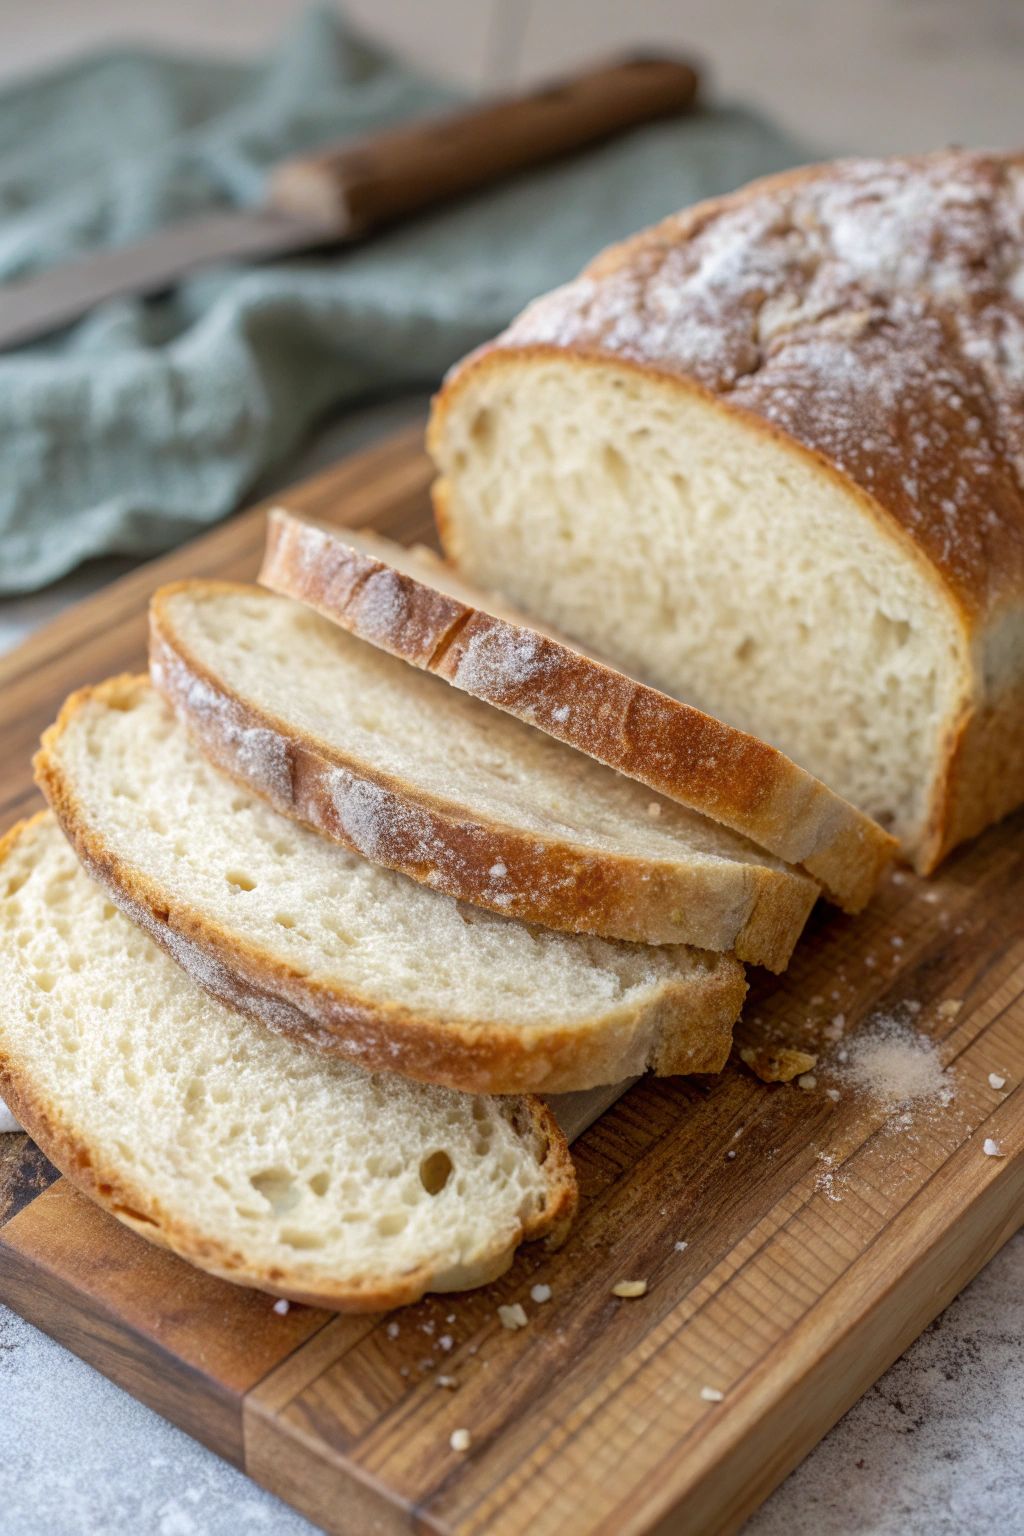
Soft sourdough sandwich bread is one of the most satisfying, deeply comforting, and versatile artisan breads enjoyed across many parts of the world. Its popularity comes from its ultra-tender, tight crumb structure, thin golden-brown crust, incredible slicing capability, and the way it delivers a subtle hint of complex tangy notes in every single bite without feeling heavy or overly rich. A slice of freshly baked soft sandwich bread can be enjoyed as a quick weekday breakfast toast, a post-workout turkey sandwich base, a comforting grilled cheese dinner, a make-ahead loaf for the week, a school lunchbox staple, or simply whenever a nutritious, satisfying classic bread is desired.
Unlike a standard rustic sourdough boule that has a thick, tooth-shattering crust and large open wild holes, this enriched pan loaf version layers in milk, butter, and honey to soften the gluten strands, creating a uniform crumb that holds condiments perfectly while performing as a high-satisfaction family-friendly meal. This comprehensive recipe explains every stage of preparation in detail, from selecting and activating the starter to kneading, shaping for a loaf pan, proofing, and baking the perfect square slice.
Introduction
Sandwich bread has long been a beloved staple across many kitchens, valued for its versatility, ease of preparation, and ability to be customized in countless ways. The sourdough version elevates this classic by layering in extra depth from natural wild fermentation, whole milk, melted butter, and honey, while keeping the interior structure incredibly soft, pillow-like, and melt-in-your-mouth tender with a slow, controlled rise. This style of sandwich bread has become especially popular for home bakers, families, and anyone looking for a gut-friendly alternative to commercial store-bought white bread that keeps them feeling energized throughout the day.
The dish relies on mixing and kneading enriched ingredients to smooth perfection, then combining them with an active sourdough starter and baking in a standard loaf tin for structure. This characteristic makes soft sourdough sandwich bread especially rewarding to prepare at home because it slices beautifully without crumbling and stays fresh on the counter days longer than lean breads due to the natural acidity and enrichment fat. The resulting loaf is naturally hearty, tender, and deeply satisfying.
Homemade soft sourdough sandwich bread requires a handful of fresh and pantry ingredients, basic kitchen equipment, and a generous amount of preparation time. Even beginners can successfully prepare it with a little patience.
Yield
This recipe produces one standard 9×5-inch rectangular sandwich loaf, yielding approximately 14 to 16 uniform slices.
Preparation Time
- Active Prep & Kneading: 25 minutes
- Bulk Fermentation (Room Temp): 4 to 5 hours
- Shaping & Pan Proofing: 3 to 4 hours (OR overnight in the fridge)
- Baking Time: 35 to 40 minutes
- Total Time: Approximately 8 to 10 hours (or 24 hours with the cold rest option)
Main Ingredients
- 3 ½ cups (500g) unbleached strong bread flour (or high-protein all-purpose flour)
- 1 cup (240g) whole milk, lukewarm (warmed to around $80^\circ\text{F}$)
- ½ cup (100g) active, bubbly sourdough starter (fed 4-6 hours prior to mixing)
- 2 tablespoons (42g) raw honey or pure maple syrup
- 4 tablespoons (56g) unsalted butter, softened at room temperature
- 1 ½ teaspoons (9g) fine sea salt
- 1 tablespoon milk or melted butter (for brushing the top crust after baking)
Additional Optional Ingredients
- 2 tablespoons whole flaxseeds mixed into the dough crumb
- ¼ cup rolled oats scattered on top of the wet crust before baking
- 1 tablespoon chia seeds for an added nutritional punch
- 1 tablespoon vital wheat gluten (if using lower protein flour for an extra rise)
- 1 teaspoon garlic powder for a savory sandwich base accent
- 2 tablespoons heavy cream substituted for a portion of the milk for ultimate richness
- 1 tablespoon molasses instead of honey for a deeper golden tone
- A handful of toasted sesame seeds pressed into the top crust
- A pinch of ground dough conditioner for commercial-style softness
- 2 tablespoons milk powder added to the dry flour to increase structural tenderness
Equipment Required
- Large glass or ceramic mixing bowl (or a stand mixer fitted with a dough hook)
- Digital kitchen scale (highly recommended for exact baking hydration)
- Measuring cups and spoons
- Standard 9×5-inch metal loaf pan
- Dough scraper (bench knife)
- Plastic wrap or a damp kitchen towel
- Pastry brush
- Wire cooling rack
- Sharp serrated bread knife (essential for clean slicing)
Choosing the Perfect Sourdough Starter
The quality and activity of the starter directly affects the final height, structure, and mild flavor profile of the sandwich bread. Selecting and timing the right starter is therefore extremely important.
Choose an active, recently fed sourdough starter that has doubled or tripled in volume, looks light and bubbly on the surface, and has a mild, sweet-and-sour aroma. For a soft sandwich bread, it is best to use the starter right at its peak (4-6 hours after feeding) rather than letting it fall back down into a sharp, highly acidic state, which can degrade the milk proteins and weaken the soft crumb.
Avoid using cold, sour discard straight from the refrigerator without feeding, as it will struggle to lift the heavy fats of the milk and butter, resulting in a dense, short, and overly sour brick.
Mixing and Kneading the Enriched Dough
Because this dough contains enriching fats (milk and butter), it requires thorough kneading to build a strong, tight gluten sheet that traps tiny, uniform air pockets rather than wild, rustic holes.
Stand Mixer Method (preferred for easiest results):
- In the bowl of your stand mixer, combine the lukewarm whole milk, active sourdough starter, and raw honey. Whisk briefly to dissolve.
- Add the bread flour and fine sea salt. Turn the mixer to low speed and mix for 2 to 3 minutes until a cohesive, sticky dough forms.
- With the mixer running on medium-low, add the softened unsalted butter one tablespoon at a time, allowing each piece to fully incorporate before adding the next.
- Once all the butter is added, increase the speed slightly and knead for 7 to 8 minutes. The dough should completely pull away from the sides of the bowl, looking smooth, shiny, and highly elastic.
Hand Kneading Method (alternative):
- Whisk milk, starter, honey, and salt in a large bowl, then stir in the flour until shaggy.
- Tip onto a clean counter and stretch the dough out, working the softened butter into the mass with the heels of your hands.
- Knead vigorously for 12 to 15 minutes using a slap-and-fold motion until the grease disappears and the dough feels smooth and bouncy.
Bulk Fermentation (The First Rise)
- Shape the kneaded dough into a smooth ball and place it into a lightly greased mixing bowl.
- Cover the bowl tightly with plastic wrap or a damp kitchen towel to prevent a dry skin from forming on the dough.
- Let the dough rise at room temperature ($72^\circ\text{F}$ to $76^\circ\text{F}$) for 4 to 5 hours during bulk fermentation. Because of the enriching ingredients, this dough will rise more slowly than a lean bread dough. Look for it to increase in size by about 50-60%, feeling puffy, soft, and full of internal gas.
Shaping for the Loaf Pan
- Lightly grease your 9×5-inch metal loaf pan with butter or non-stick spray.
- Gently tip the bulk-fermented dough onto a very lightly floured work surface. Press down on the dough gently with the flats of your hands to deflate it and express any large, erratic air bubbles; this ensures a tight, uniform sandwich crumb.
- Pat the dough out into a neat rectangle that is roughly 8 inches wide and 12 inches long.
- Fold the left third of the rectangle into the center, then fold the right third over it (like folding a business letter), matching the exact width of your loaf pan.
- Starting from the short edge furthest away from you, roll the dough tightly toward you into a firm, compact cylinder, creating tight surface tension along the outer skin.
- Pinch the final seam firmly to seal it, and place the cylinder seam-side down into the prepared loaf pan.
Pan Proofing (The Final Rise)
Allowing the shaped dough to rise smoothly inside the loaf pan dictates how tall, light, and perfectly shaped your final sandwich slices will be.
Cover the loaf pan loosely with a piece of oiled plastic wrap or a tall inverted container to give the dough room to expand upward.
Let it proof at room temperature for 3 to 4 hours. The dough should slowly rise until the crown of the loaf sits about 1 inch above the rim of the pan, looking beautifully domed and pillowy.
Note: Alternatively, you can slide the shaped pan into the refrigerator overnight for 12 hours, then bring it out to the counter for 2 hours the next morning to finish its rise before baking.
Understanding Softness and Crumb Structure
Achieving the perfect store-bought softness with artisan sourdough relies entirely on the science of enrichment.
The proteins and fats found in whole milk and real butter physically coat the gluten strands, preventing them from forming a tough, rubbery, chewy network. This gives the bread its characteristic tender bite.
The addition of honey adds natural invert sugars that retain moisture inside the baked loaf, keeping the crumb structure soft and preventing it from drying out or going stale for days.
Always make sure to deflate the large bubbles during the shaping stage; if you leave large air pockets, your sandwich fillings will slip right through the holes of the toast.
Optional Add-In and Flavor Boosting Techniques
Some families prefer a pristine, snowy white classic slice, while others enjoy a rustic, grainy bakery-style sandwich slice.
For a simple finish:
Use only the base bread flour, milk, butter, and honey, baking it plain for a clean sandwich base that suits any sweet or savory spread.
For an artisanal grain finish:
Brush the top of the risen dough lightly with water or milk and press a generous layer of rolled oats and flaxseeds into the crown right before it goes into the oven.
For a rich brioche-style finish:
Substitute half of the milk volume with heavy cream, increase the sugar content by one tablespoon, and brush the top with an egg wash before baking for a glossy, deep-golden holiday crust profile.
Making a Lighter Alternative Whole Grain Version
Many people enjoy a modified version of the sandwich loaf that reduces the white flour content or swaps out the fats.
Replace 1 ½ cups of the white bread flour with fine whole wheat flour to create a honey whole wheat sourdough sandwich loaf that is packed with fiber.
Swap the unsalted butter for high-quality extra virgin olive oil or coconut oil to achieve a dairy-free soft crumb texture.
Simple Plain Version
Many people enjoy the sandwich dough baked simply without any extra crust washes.
The combination of fermented wild yeast and the rich dairy base creates a beautifully comforting bread that requires nothing more than a simple bake.
Simply skip any top toppings or post-bake butter brushes, letting the loaf cool completely in its natural, rustic state.
Traditional Baking Method
- Preheat your oven to $375^\circ\text{F}$ ($190^\circ\text{C}$) during the final 30 minutes of the loaf rise, placing the oven rack in the center position.
- Remove the plastic wrap from the risen loaf pan. Do not score the dough; sandwich bread is meant to expand naturally into a soft, round dome without sharp ears.
- Place the pan into the preheated oven and bake at $375^\circ\text{F}$ ($190^\circ\text{C}$) for 35 to 40 minutes. The top should turn a gorgeous, uniform golden-brown color, and the internal temperature should read $200^\circ\text{F}$ on a digital probe thermometer.
- Remove the pan from the oven and immediately brush the hot top crust generously with a tablespoon of melted butter or milk. This softens the top crust completely as it cools, keeping it thin and pliable.
- Let the loaf sit in the pan for 5 minutes, then turn it out gently onto a wire cooling rack.
Elegant Presentation Method
- Place the fully cooled, beautiful rectangular sandwich loaf onto a long wooden slicing board.
- Using a sharp serrated knife, slice the loaf cleanly into uniform, even, thin slices, displaying the tight, flawless interior crumb structure.
- Arrange the slices neatly overlapping on a serving platter next to a dish of homemade berry jam, a block of sharp white cheddar, and a dish of whipped herb butter.
- This presentation works exceptionally well for morning family breakfasts, elegant high-tea parties, and weekend brunch spreads.
Honey Whole Wheat Sourdough Sandwich Loaf
- Ingredients: Dough base, 1.5 cups whole wheat flour, 1 extra tablespoon honey
- Method: Swap a portion of the white flour for whole wheat and increase the honey slightly to create a nutty, classic honey-wheat profile.
Cinnamon Swirl Sourdough Sandwich Loaf
- Ingredients: Dough base, 1 tablespoon cinnamon, 3 tablespoons brown sugar
- Method: Roll out the dough into a rectangle, dust heavily with cinnamon and brown sugar, then roll up tightly before panning to create an extraordinary breakfast toast loaf.
Jalapeño Cheddar Sandwich Loaf
- Ingredients: Dough base, ½ cup diced cheddar cubes, 1 jalapeño (finely chopped)
- Method: Fold small cheese cubes and fresh jalapeño bits into the dough during the final kneading stages for a spicy, savory grilled-cheese bread.
Maple Pecan Soft Sandwich Bread
- Ingredients: Dough base, pure maple syrup, ½ cup finely chopped pecans
- Method: Swap the honey for real maple syrup and fold in finely chopped pecans for a cozy, aromatic autumn breakfast profile.
Herb and Garlic Pull-Apart Sandwich Loaf
- Ingredients: Dough base, 4 tablespoons garlic butter, dried parsley
- Method: Divide the dough into 8 equal balls, dip each ball in garlic herb butter, and layer them tightly inside the loaf pan to create a fun pull-apart sandwich bread.
Swirled Rye and White Sandwich Loaf
- Ingredients: Half batch plain dough, half batch caraway-rye dough
- Method: Prepare a plain dough and a rye dough separately, roll them out thin, stack them on top of each other, and roll up to create a beautiful marbled rye slice.
Sweet Milk and Raisin Loaf
- Ingredients: Dough base, ¾ cup dark raisins, extra tablespoon sugar
- Method: Fold sweet raisins into the enriched milk batter for a sweet, comforting afternoon tea slice.
Everything Bagel Crusted Sandwich Loaf
- Ingredients: Dough base, egg wash, 2 tablespoons everything bagel seasoning
- Method: Brush the top dome of the risen dough with an egg wash and coat it heavily with everything seasoning right before sliding it into the oven.
Vegan Soft Sourdough Sandwich Loaf
- Ingredients: Dough base, almond milk, melted coconut oil, maple syrup
- Method: Swap the whole milk for plant milk and replace the butter with coconut oil to achieve a fully plant-based ultra-soft sandwich bread.
Premium French Toast Preparation
- Ingredients: Two thick stale slices of soft sandwich bread, egg custard base, butter
- Method: Cut day-old sourdough sandwich bread into thick 1-inch slices, submerge in a rich egg-and-vanilla wash, and fry in hot butter for the ultimate fluffy French toast.
Nutritional Information
Soft sourdough sandwich bread naturally contains:
- Complex Carbohydrates (gently broken down by wild fermentation for easier digestion)
- Calcium and Vitamin D (derived from the whole milk content)
- Healthy dietary fats (from real butter, providing sustained energy)
- B-Vitamins (Thiamin, Riboflavin, Niacin)
- Iron and Zinc
- Lactic organic acids (which act as a natural, healthy preservative for the loaf)
The exact nutritional content varies depending on the specific ingredients and quantities used.
Common Mistakes
- Using a cold, weak, or un-fed starter discard, which fails to lift the heavy fats of the milk and butter, creating a short, dense loaf.
- Skipping the kneading stage or under-kneading, leaving the gluten network weak, which results in crumbly bread that falls apart when sliced.
- Leaving large, erratic air bubbles inside the dough during the shaping stage, creating massive holes in your morning sandwich toast.
- Shaping the dough cylinder too loosely, causing the loaf to expand sideways and flatten out rather than rising straight up over the pan rim.
- Baking the bread in a cold oven or misjudging the oven temperature, which leaves the interior raw, pasty, and doughy while the crust darkens.
- Slicing into the loaf while it is still steaming hot, which forces the trapped steam to condense, turning the interior crumb gummy and wet.
- Storing the fresh loaf in a standard refrigerator, which crystallizes the starches and causes the artisan sandwich bread to go stale instantly.
- Using high-acid sourdough starter that has sat for days on the counter, which breaks down the structure and makes the loaf taste unpleasantly sour.
- Over-proofing the dough in the pan until it bubbles over the edges and collapses like a deflated balloon the moment it hits the oven heat.
- Skipping the post-bake butter brush, which results in a thick, tough, chewy crust rather than a thin, store-bought soft sandwich casing.
Storage Guidelines
- Store the completely cooled loaf inside a paper bread bag or wrapped loosely in a clean cotton tea towel at room temperature for up to 4 to 5 days.
- The natural lactic acidity of the sourdough fermentation process acts as an organic preservative, keeping the bread free of mold much longer than standard homemade breads.
- Avoid storing artisan sandwich bread in a standard plastic bag for the first 2 days, as it traps moisture and can make the thin crust soft and wrinkly.
- Never store this bread in the refrigerator, as the cold temperature accelerates staling.
Freezing Instructions
Soft sourdough sandwich bread freezes beautifully for long-term storage. Slice the completely cooled loaf into uniform pieces using a sharp serrated knife. Place the entire sliced loaf back together, slide it into a heavy-duty freezer storage bag, press out all excess air, and freeze for up to 3 months. Whenever you need a slice, simply remove individual pieces straight from the freezer and pop them directly into a standard bread toaster for fresh, hot, artisan toast in minutes.
Creative Uses for Leftover Sandwich Bread
- Cut stale leftover slices into clean cubes, toss with olive oil and garlic salt, and bake for 10 minutes to create crunchy soup croutons.
- Submerge day-old slices into a rich egg and milk custard mix, layer in a dish, and bake to create a rich, comforting breakfast bread pudding.
- Dry the leftover slices completely in a low oven and grind them in a blender to make premium, crispy sourdough breadcrumbs.
- Butter the exterior of two stale slices heavily, fill with cheese, and grill slowly under a heavy pan for the ultimate crispy grilled cheese sandwich.
- Toast a stale slice until completely hard, rub a raw garlic clove across the rough surface, and drizzle with olive oil for rapid Italian bruschetta.
Party Serving Suggestions
- Bake the loaf fresh the day before a gathering, slicing it thin to create elegant, delicate afternoon tea finger sandwiches filled with cucumber and cream cheese.
- Set out a large platter of toasted sourdough sandwich triangles alongside a festive DIY “Grilled Cheese Bar” featuring gourmet cheeses, bacon, and chutneys.
- Pair thick slices of the toasted buttered bread with bowls of hot, rustic tomato soup or creamy chicken chowders during casual autumn gatherings.
- Wrap a whole, uncut cooled loaf beautifully in natural brown parchment paper tied with a rustic jute twine as a thoughtful, high-value homemade gift for a host.
- Use fun cookie cutters to stamp out creative star or animal-shaped mini sandwiches from the soft slices to delight children at birthday party tables.